Creating a cozy and functional living space for your beloved canine companion can be a rewarding and enjoyable experience. Building a 2-level dog house is an excellent way to provide your furry friend with a comfortable and safe retreat while adding a charming touch to your outdoor space. Here's a comprehensive guide to help you construct a sturdy and stylish 2-level dog house:
Materials:
- Plywood sheets (1/2 inch and 3/4 inch thickness)
- Wood screws
- Nails
- Hammer
- Drill
- Saw
- Measuring tape
- Level
- Sandpaper
- Wood sealant
- Paint or stain (optional)
Step 1: Design and Measurements
Begin by determining the appropriate size for your dog house based on your pet's size and needs. Draw a detailed plan or sketch of the 2-level structure, including dimensions for each level, the roof, and the entrance.
Step 2: Cutting the Wood
Carefully measure and mark the plywood sheets according to the dimensions specified in your plan. Use a saw to cut the plywood pieces precisely. Sand the edges of the cut pieces to smooth any rough edges.
Step 3: Assembling the Base
Start by constructing the base of the dog house. Join the plywood pieces for the floor and walls using wood screws. Ensure that the corners are square and the structure is level.
Step 4: Building the Second Level
Next, assemble the second level following the same principles as the base. Secure the floor and walls of the second level with screws, creating a sturdy and elevated platform.
Step 5: Attaching the Walls
Attach the walls of the dog house to the base and second level using screws or nails. Double-check the alignment and stability of the structure.
Step 6: Installing the Roof
Measure and cut the plywood pieces for the roof. Assemble the roof panels and attach them to the top of the dog house with screws or nails. Ensure that the roof is slanted slightly to prevent water accumulation.
Step 7: Adding an Entrance
Determine the appropriate location for the entrance, typically on the front side of the dog house. Cut an opening in the plywood wall large enough for your dog to enter comfortably. Frame the entrance with additional plywood pieces to create a sturdy doorway.
Step 8: Sanding and Finishing
Sand the entire dog house thoroughly to smoothen any rough surfaces. Apply a wood sealant to protect the wood from moisture and weather damage. If desired, you can paint or stain the dog house to match your outdoor décor.
Step 9: Adding Details
Enhance the appearance of your dog house by adding decorative touches. Consider adding a porch, stairs, windows, or a personalized nameplate for your furry friend.
Step 10: Final Touches
Place a comfortable dog bed or cushion inside the house to provide a cozy resting spot for your pet. Add a water-resistant cover to the roof for additional protection during rainy weather.
With careful planning, attention to detail, and a bit of creativity, you can construct a beautiful and functional 2-level dog house that will provide your canine companion with a secure and comfortable haven for years to come.

Two Story Playhouse And Doghouse Design Fancy Dog Houses House Diy

Two Story Playhouse And Doghouse Design 9590

How To Build An Outdoor Chain Link Dog Kennel Family Handyman

Insulated Dog House Plans Free Garden How To Build Projects

2 Car Garage Apartment Plan Number 47170 With 1 Bed Bath Plans Loft

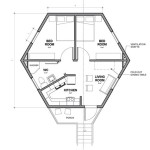
Diana S Dog Trot Dogtrot Cabin Floor Plan

Level 1 Dog Trot House Plans Floor

Insulated Dog House Plans Complete Set Small With On Popscreen

Doghouse Dormers Framing From The Ground Up Fine Homebuilding

Digital Plans For Large Double Dog Kennel Tv Stand Diy Crate Furniture