How to Draw a Floor Plan in AutoCAD 2010
AutoCAD is a powerful software program that can be used to create technical drawings, including floor plans. Floor plans are essential for planning and constructing buildings, as they provide a visual representation of the layout of a space. In this article, we will discuss the essential aspects of drawing a floor plan in AutoCAD 2010.
1. Creating a New Drawing
To create a new drawing in AutoCAD 2010, open the program and click on the "File" menu. Then, select "New" to create a new drawing file. You will be prompted to specify the drawing template to use. For floor plans, you can use the "Architectural" template, which provides a set of predefined layers and settings commonly used in architectural drawings.
2. Setting Up the Drawing Units
Once you have created a new drawing, you need to set up the drawing units. This will determine the scale of your drawing. To set the drawing units, click on the "Format" menu and select "Units". In the "Units" dialog box, select the desired units from the drop-down menu. For floor plans, it is common to use feet and inches.
3. Creating the Walls
The first step in drawing a floor plan is to create the walls. To create a wall, click on the "Draw" menu and select "Line". Then, click on the starting point of the wall and drag the cursor to the end point. To create a closed wall, click on the starting point again. You can also use the "Rectangle" command to create a rectangular wall.
4. Adding Doors and Windows
Once you have created the walls, you can add doors and windows. To create a door, click on the "Insert" menu and select "Block". Then, select the "Door" block from the library. To insert the door, click on the insertion point and drag the cursor to the desired size. You can also use the "Window" command to add windows to your floor plan.
5. Adding Furniture and Fixtures
After you have added the walls, doors, and windows, you can start adding furniture and fixtures to your floor plan. To add furniture, click on the "Insert" menu and select "Block". Then, select the desired furniture block from the library. To insert the furniture, click on the insertion point and drag the cursor to the desired size. You can also use the "Copy" and "Paste" commands to duplicate furniture items.
6. Dimensioning the Floor Plan
Once you have completed the floor plan, you need to dimension it. Dimensioning provides the measurements of the space, which is essential for construction purposes. To dimension the floor plan, click on the "Annotate" menu and select "Dimension". Then, select the objects you want to dimension and click on the "OK" button. AutoCAD will automatically generate the dimensions.
7. Saving and Exporting the Floor Plan
Once you have completed the floor plan, you can save it to a file. To save the file, click on the "File" menu and select "Save". Then, specify the file name and location. You can also export the floor plan to other formats, such as PDF or DWG. To export the file, click on the "File" menu and select "Export". Then, select the desired file format and specify the file name and location.

Autocad Tutorials Introduction To Plotting Scale With Layouts In 2010

Autocad 2010 Tutorial Series Drawing A Floor Plan By Tod Stephens Ebook Barnes Noble

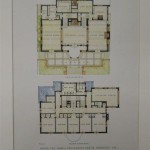
Autocad 2010 Floorplan Drawing

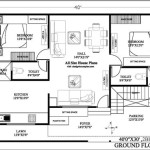
Autocad Floor Plan Tutorial For Beginners 1

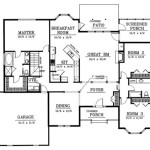
Autocad 2010 How To Draw A Simple Floor Plan Step By

Autocad Floor Plan Tutorial For Beginners 1

Autocad Tutorial Working With Layouts Part 1

Autocad Floor Plan Tutorial For Beginners 1

Autocad 2010 3d House Modeling Tutorial

Drawing A House In Autocad 7 Basement And Dimensioning