How to Make a Floor Plan in AutoCAD 2010
AutoCAD 2010, while an older version of the software, remains a viable tool for creating accurate and detailed floor plans. This article provides a comprehensive guide on how to effectively utilize AutoCAD 2010 to produce professional-looking floor plans. The fundamental principles and techniques outlined here will enable users to accurately represent building layouts, dimensions, and architectural features. Before beginning, it's crucial to ensure that AutoCAD 2010 is properly installed and configured on the user's system.
The first step involves setting up the drawing environment. This includes establishing appropriate units, limits, and layers. Accurate units are essential for representing real-world dimensions in the digital drawing. Limits define the drawing area within which the floor plan will be created. Layers are used to organize and manage different elements of the floor plan, such as walls, doors, windows, and furniture. Proper setup ensures a clean, organized, and accurate drawing process.
Once the environment is established, the next stage involves drawing the exterior walls of the building. This requires precise use of drawing tools, such as the Line and Offset commands. Accuracy is paramount at this stage, as the exterior walls form the foundation of the entire floor plan. Dimensions should be carefully measured and input to reflect the actual building dimensions. The use of Ortho mode can be invaluable in ensuring that lines are drawn precisely horizontally or vertically.
After the exterior walls are in place, the next step is to create the interior walls. This process is similar to drawing the exterior walls but requires careful consideration of room sizes and layout. The Offset command is particularly useful for creating parallel interior walls at specified distances. Trim and Extend commands can be used to connect and clean up wall intersections. Attention to detail is crucial to ensure that the resulting floor plan accurately reflects the intended design.
Setting Up the AutoCAD Environment
Configuring the AutoCAD environment is a critical first step for efficient and accurate floor plan creation. This involves setting the units, limits, and creating layers. Each of these elements plays a vital role in maintaining drawing accuracy and organization.
To set the units, type "UNITS" in the command line and press Enter. The Drawing Units dialog box will appear. In this dialog box, select the desired units of measurement from the "Insertion scale" dropdown menu. Common options include inches, feet, millimeters, and meters. For architectural drawings, "Architectural" units are often preferred, which display dimensions in feet and inches. Precision can also be adjusted to define the level of detail shown in the drawing. Once the units are set, click "OK" to save the changes.
Next, define the drawing limits by typing "LIMITS" in the command line and pressing Enter. AutoCAD will prompt you to specify the lower-left corner. Typically, the origin point (0,0) is used for the lower-left corner. Press Enter to accept the default. Then, specify the upper-right corner. This defines the boundaries of the drawing area. The appropriate values for the upper-right corner depend on the size of the floor plan. Estimating the overall dimensions of the building beforehand can help determine suitable limit values. For example, if the building is approximately 50 feet by 70 feet, setting the upper-right corner to (50,70) is a reasonable starting point. After specifying the upper-right corner, type "ZOOM" in the command line and then type "A" (for All) and press Enter. This will zoom the drawing to fit the defined limits within the viewport.
Creating layers is essential for organizing different elements of the floor plan. This allows for easy selection, modification, and visibility control of specific drawing components. To create layers, type "LAYER" in the command line and press Enter. The Layer Properties Manager will appear. Click the "New Layer" button (the icon that looks like a stack of papers with a star on it). This will create a new layer with a default name. Rename the layer to something descriptive, such as "Walls," "Doors," "Windows," or "Furniture." Assign a color to each layer to visually distinguish them. You can also specify a linetype and lineweight for each layer. For example, walls might be assigned a thicker lineweight than furniture. Repeat this process to create layers for all the different elements of the floor plan. Be sure to set the current layer to the appropriate layer before drawing each element. The current layer is the layer to which all new objects will be added.
Drawing Walls and Architectural Features
Once the drawing environment is set up, proceed to drawing the walls and incorporating architectural features. This involves utilizing AutoCAD's drawing and modification tools to accurately represent the building's structure and design.
Start by drawing the exterior walls. Select the "Walls" layer as the current layer. Use the Line command to draw the outline of the building. Type "L" in the command line and press Enter to activate the Line command. Click to specify the starting point of the first wall. Then, move the cursor in the desired direction and enter the length of the wall. Press Enter to complete the line segment. Repeat this process to draw all the exterior walls. Use Ortho mode (press F8) to ensure that the lines are drawn perfectly horizontally or vertically. This is important for maintaining accurate angles and dimensions. After drawing the exterior walls, use the Offset command to create the wall thickness. Type "O" in the command line and press Enter to activate the Offset command. Specify the offset distance (e.g., 6 inches or 8 inches for a typical wall thickness). Select the line representing the exterior wall and then click on the side where you want the offset to occur. This will create a parallel line representing the inside edge of the wall. Use the Trim command to clean up the corners where the walls intersect. Type "TR" in the command line and press Enter twice to activate the Trim command. Click on the portions of the lines that you want to remove to create clean corner joints.
Next, draw the interior walls. The process is similar to drawing the exterior walls, but you will need to consider the layout of the rooms and the placement of doors and windows. Use the Line and Offset commands to create the interior walls. Pay attention to the dimensions of the rooms and the placement of doorways. Use the Trim and Extend commands to connect and clean up the wall intersections. For doors, create openings in the walls where the doors will be located. Use the Line command to draw the door opening and then use the Trim command to remove the portion of the wall within the opening. For windows, create similar openings in the walls. The size and placement of the window openings should be based on the desired window dimensions.
To add architectural features, such as stairs, fireplaces, or built-in cabinets, use the appropriate drawing tools and techniques. For stairs, use the Line and Offset commands to create the individual steps and risers. For fireplaces, use the Rectangle and Circle commands to create the basic shape of the fireplace and then add details such as the mantel and chimney. For built-in cabinets, use the Line and Rectangle commands to create the cabinet boxes and then add details such as doors and shelves. Remember to place these architectural features on their own layers for better organization and control.
Adding Doors, Windows, and Annotations
Once the walls and architectural features are drawn, the next step is to add doors, windows, and annotations. These elements are essential for completing the floor plan and providing clear and informative information.
Doors and windows are typically represented as blocks in AutoCAD. Blocks are pre-drawn objects that can be inserted into the drawing and easily reused. To insert a door or window block, type "INSERT" in the command line and press Enter. The Insert dialog box will appear. Click the "Browse" button to locate the door or window block file. Select the block file and click "Open." In the Insert dialog box, specify the insertion point, scale, and rotation angle for the block. You can also specify whether to explode the block after insertion. Exploding the block will break it into individual lines and arcs, which can then be modified separately. However, it is generally recommended to keep the block intact for ease of editing and reuse. Click "OK" to insert the block into the drawing. Repeat this process to insert all the doors and windows into the floor plan. Make sure to position the doors and windows correctly within the wall openings.
Annotations are text and dimensions that provide additional information about the floor plan. Annotations can include room names, dimensions of walls and rooms, and notes about specific features. To add text annotations, type "TEXT" in the command line and press Enter. Specify the starting point, height, and rotation angle for the text. Type the text you want to display and then press Enter to complete the text object. You can also use the MTEXT command to create multiline text objects. To add dimensions, use the DIMLINEAR, DIMALIGNED, and DIMANGULAR commands. These commands allow you to create linear, aligned, and angular dimensions. Select the points you want to dimension and then specify the location of the dimension line. AutoCAD will automatically calculate and display the dimension value. Adjust the dimension style to ensure that the dimensions are displayed in a clear and readable format.
Layer management is particularly important when adding annotations. Create separate layers for text and dimensions to keep them organized and easily controlled. Different colors and lineweights can be assigned to these layers to further differentiate them from other elements in the drawing. Ensure that all annotations are placed on the correct layers and are legible and accurate.
By following these steps, users can create accurate and detailed floor plans in AutoCAD 2010. This guide provides a foundational understanding of the key tools and techniques required for successful floor plan creation. Through practice and experimentation, users can further refine their skills and develop their own efficient workflows.

Autocad Tutorials Introduction To Plotting Scale With Layouts In 2010

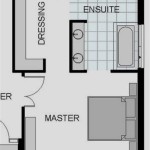
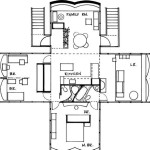
Autocad Floor Plan Tutorial For Beginners 1

Autocad Tutorial Working With Layouts Part 1

Autocad Floor Plan Tutorial For Beginners 1

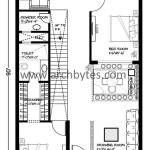
Making A Simple Floor Plan In Autocad Part 1 Of 3

Autocad 2010 3d House Modeling Tutorial

Create Floor Plans With Autocad Lt Acad Systems Autodesk Gold Partner Training Certification Center

Here We Are Writing About Autocad Tutorial 2010 What Is Auto Cad Learn Dra

Autocad 2010 3d House Modeling Tutorial

Autocad Tutorials Introduction To Drawing A Floorplan In 2010