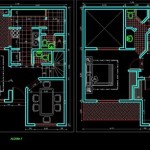
How to Design a Floor Plan in AutoCAD
AutoCAD is a powerful computer-aided design (CAD) software used extensively in designing and drafting floor plans. Its precise drawing capabilities, coupled with a range of tools, make it an ideal choice for architects, interior designers, and contractors. This guide will provide you with a comprehensive overview of the steps involved in designing a floor plan in AutoCAD.
1. Create a New Drawing
Start by opening AutoCAD and creating a new drawing file. Select the "Architectural" template, which provides a predefined setup for architectural drawings, including appropriate units and drawing scales.
2. Define the Drawing Area
Establish the boundaries of your floor plan by defining the drawing area. Use the "Rectang" command to draw a rectangle that represents the overall dimensions of the space you are designing. This rectangle will serve as the base upon which you will build the floor plan.
3. Draw the Walls
Next, draw the walls that define the rooms and spaces within the floor plan. Use the "Line" command to create straight walls and the "Arc" command for curved walls. Ensure that the walls intersect properly at corners and openings.
4. Insert Doors and Windows
Add doors and windows to the floor plan using the appropriate blocks or symbols from AutoCAD's library. Position the doors and windows accurately within the walls and define their swing direction.
5. Define Rooms and Spaces
Create closed polylines around each room or space within the floor plan. These polylines will serve as boundaries for assigning attributes and calculating areas.
6. Add Furniture and Fixtures
Enhance the floor plan by inserting furniture, fixtures, and appliances. Use blocks or create your own custom symbols to represent different elements within the space. Position and arrange them to create a realistic representation of the design.
7. Create Layers
To organize and manage the different elements of the floor plan, create separate layers for walls, doors, windows, furniture, and fixtures. This allows you to control the visibility and editing of each element independently.
8. Add Dimensions and Annotations
Add essential dimensions and annotations to the floor plan to provide clear measurements and information. Use the "Dim" command for linear dimensions and the "Text" command for annotations.
9. Generate a Scale Drawing
Select the appropriate drawing scale from AutoCAD's predefined options or create a custom scale. This will enable you to produce a scaled drawing that represents the actual dimensions of the floor plan.
10. Save and Export the Floor Plan
Once the floor plan is complete, save the drawing file in the desired file format, such as DWG or DWF. You can also export the floor plan to other formats, such as PDF or JPG, for sharing and presentation purposes.
By following these steps, you can effectively design a floor plan in AutoCAD. This powerful tool empowers you to create precise and detailed plans that accurately represent the intended design. With practice and proficiency, you can harness the full potential of AutoCAD for your architectural and interior design projects.
Making A Simple Floor Plan In Autocad Part 1 Of 3

How To Draw Floor Plans In Autocad Edrawmax

How To Draw Floor Plans In Autocad Edrawmax

Autocad Simple Floor Plan For Beginners 1 Of 5

Autocad Drawing And Coohom Design 3d Fast Rendering Blog

Is Autocad The Best Floor Plan For Estate Agents Elements Property

Floor Plan Create 2d 3d Plans Autodesk

How To Draw Floor Plans In Autocad Edrawmax

Autocad Tutorial Draw A House Floor Plan Free Cad Blocks In Dwg File Format

Floor Plan Free Cads


