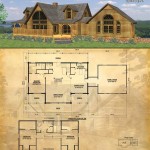
Make Your Own Floor Plans
Creating a floor plan is a crucial step whether designing a new home, renovating an existing space, or simply visualizing furniture placement. While hiring a professional architect or designer is an option, creating a floor plan yourself can be a rewarding and cost-effective endeavor. Numerous tools and resources are available to empower individuals to design their own floor plans, ranging from simple sketching to sophisticated software.
Key Considerations When Planning Your Floor Plan
Several essential aspects must be considered before diving into the floor plan creation process. These include the purpose of the space, desired room sizes, traffic flow, natural light, furniture placement, building codes, and budget constraints.
Methods for Creating Floor Plans
Various methods can be employed to create floor plans, each offering its own benefits and drawbacks.
1. Hand-Drawing
This traditional method involves using graph paper, rulers, and pencils to sketch the floor plan. It is a simple, accessible approach, ideal for initial brainstorming and quick visualizations. However, revisions can be time-consuming and precision can be challenging.
2. Online Floor Plan Creators
Numerous websites and online tools offer user-friendly interfaces for creating floor plans. These platforms often provide pre-designed templates and drag-and-drop functionalities, making the process straightforward and efficient. Many offer free basic versions, with paid subscriptions unlocking advanced features.
3. Professional Design Software
Software programs specifically designed for architectural and interior design provide advanced tools and features for creating detailed and precise floor plans. These platforms offer a wide range of functionalities, including 3D modeling, rendering, and material selection. However, they typically require a steeper learning curve and come with a higher cost.
Essential Steps for Creating a Floor Plan
Regardless of the chosen method, several key steps contribute to a well-designed and functional floor plan.
1. Measure the Space
Accurate measurements are crucial for creating a realistic floor plan. Measure the length and width of each room, noting the locations of doors, windows, and other fixed elements.
2. Choose a Scale
Select an appropriate scale to represent the dimensions of the space accurately on the floor plan. Common scales include ¼ inch = 1 foot and ⅛ inch = 1 foot.
3. Draw Walls and Partitions
Outline the walls and partitions of the space, adhering to the chosen scale. Indicate the thickness of walls and the location of doors and windows.
4. Add Architectural Features
Include architectural features such as fireplaces, built-in shelves, and staircases. Mark the locations of plumbing fixtures and electrical outlets.
5. Place Furniture and Fixtures
Position furniture and fixtures within the floor plan, considering traffic flow and functionality. Experiment with different arrangements to optimize space utilization.
6. Annotate the Floor Plan
Add annotations and labels to clarify dimensions, room names, and other relevant information. Include details about materials and finishes.
Tips for Effective Floor Plan Design
Implementing a few essential tips can significantly enhance the functionality and aesthetics of the floor plan.
1. Consider Traffic Flow
Ensure smooth and unobstructed traffic flow throughout the space. Avoid bottlenecks and create clear pathways between rooms.
2. Maximize Natural Light
Strategically position windows and doors to maximize natural light penetration. Consider the orientation of the building and the surrounding environment.
3. Optimize Space Utilization
Make efficient use of available space by carefully planning furniture placement and minimizing wasted areas.
4. Adhere to Building Codes
Ensure the floor plan complies with local building codes and regulations regarding room sizes, accessibility, and safety requirements.
5. Seek Feedback
Share the floor plan with others and solicit feedback to identify potential improvements or overlooked aspects.
Resources for Creating Floor Plans
Numerous resources are available to assist individuals in creating their own floor plans. These include online tutorials, design guides, and software reviews. Exploring these resources can provide valuable insights and guidance throughout the process.
Benefits of Creating Your Own Floor Plan
Taking the initiative to create a floor plan offers several significant advantages, empowering individuals to actively participate in the design process and personalize their spaces.
1. Cost Savings
Creating a floor plan independently eliminates the expense of hiring a professional designer, allowing for cost savings that can be allocated to other aspects of the project.
2. Creative Control
Designing a floor plan provides complete creative control over the layout and functionality of the space, enabling individuals to tailor the design to their specific needs and preferences.
3. Better Understanding of the Space
The process of creating a floor plan fosters a deeper understanding of the space, its dimensions, and its potential. This enhanced understanding can lead to more informed design decisions.
By carefully considering these factors and utilizing available resources, individuals can successfully create their own floor plans, transforming their design visions into tangible realities.

Create Floor Plan

Make Your Own Blueprint How To Draw Floor Plans

Blueprint Maker Free App

Make Your Own Blueprint How To Draw Floor Plans Drawing House Sketch Plan Blueprints

Design Your Own Home House Designing Homes

Draw Floor Plans With The Roomsketcher App

Blueprint Maker Free App

Free Floor Plan Designer

Draw Floor Plans With The Roomsketcher App

2d Floor Plans


