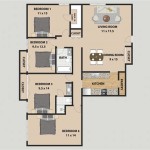
Drawing House Plans on iPad Pro: A Comprehensive Guide
The iPad Pro, combined with compatible software and accessories, offers a powerful and portable platform for creating detailed house plans. Its large screen, intuitive touch interface, and processing power make it a viable alternative to traditional desktop solutions for architects, designers, and DIY enthusiasts.
Key Software Options
Choosing the right software is crucial for a productive workflow. Several applications cater to different needs and skill levels:
*CAD Software:
Professional-grade applications like AutoCAD, Shapr3D, and Morpholio Trace offer advanced drafting tools, precise measurements, and 3D modeling capabilities. These programs often come with a subscription fee but provide extensive features for complex projects. *Floor Plan Apps:
Apps specifically designed for floor plan creation, such as Magicplan, RoomScan Pro, and Planner 5D, simplify the process with intuitive interfaces and pre-built components. These apps often provide automated measurements and furnish layout options. *Vector Drawing Apps:
Apps like Affinity Designer and Adobe Fresco offer precise vector drawing tools suitable for creating detailed 2D plans and illustrations. These programs allow for scalable artwork and offer a wide range of brush and pen options.Essential Accessories for Enhanced Productivity
While the iPad Pro’s touchscreen offers a direct drawing experience, certain accessories can significantly improve precision and efficiency:
*Apple Pencil:
The Apple Pencil provides pressure sensitivity and low latency, allowing for natural drawing and sketching directly on the screen. Its accuracy makes it ideal for detailed work and precise linework. *Keyboard:
A keyboard enhances text input for labeling plans, adding notes, and communicating with clients. The Smart Keyboard Folio or Bluetooth keyboards offer comfortable typing experiences. *External Mouse:
While optional, a mouse can improve selection accuracy and navigation within complex drawings, especially when working with intricate details.Workflow Considerations for Creating House Plans
Establishing an organized workflow ensures efficient project completion:
*Site Measurement:
Accurate measurements are foundational to any house plan. Laser measuring tools or traditional methods should be used to capture accurate dimensions of the space. *Concept Sketches:
Start with rough sketches to explore layout options and visualize the overall design. The iPad Pro allows for quick iterations and easy revisions of initial concepts. *Digital Drafting:
Once the concept is finalized, translate the sketches into a digital format using the chosen software. Utilize the software's tools for precise lines, accurate measurements, and scaled drawings. *Adding Details and Annotations:
Incorporate details such as windows, doors, fixtures, and furniture. Annotations provide essential information about dimensions, materials, and construction specifications. *Layer Management:
Properly organizing layers within the software allows for selective viewing and editing of different aspects of the plan, simplifying complex designs and revisions. *Exporting and Sharing:
Export the finished plans in various formats, such as PDF, DWG, or DXF, for sharing with clients, contractors, and other stakeholders. Cloud storage integration simplifies collaboration and file management.Benefits of Using iPad Pro for House Plans
The iPad Pro offers distinct advantages for creating house plans:
*Portability:
The iPad Pro’s portability allows for on-site drawing and revisions, eliminating the need to transport bulky laptops or drawing boards. This is particularly beneficial during site visits and client meetings. *Intuitive Interface:
The touch interface makes navigating and interacting with the software intuitive and efficient, even for users less familiar with CAD software. *Digital Collaboration:
Cloud storage integration and real-time collaboration features allow for seamless sharing and feedback between team members and clients. *Cost-Effectiveness:
While professional CAD software may require subscriptions, the iPad Pro, combined with more affordable or even free drawing apps, can be a cost-effective solution, especially for smaller projects or individual use.Tips for Maximizing Efficiency
Optimizing the iPad Pro workflow enhances productivity:
*Mastering Shortcuts:
Learning keyboard shortcuts or creating customized shortcuts for frequently used tools can dramatically speed up the drawing process. *Utilizing Templates:
Pre-built templates for common architectural elements, such as walls, doors, and windows, can significantly save time and ensure consistency across the design. *Regular Backups:
Regularly backing up project files to cloud storage or external drives prevents data loss and ensures project continuity.Integrating Augmented Reality (AR)
Leveraging AR technology takes design visualization a step further:
*3D Model Viewing:
AR allows for viewing 3D models of designed houses in real-world environments, offering a more immersive understanding of the design and spatial relationships. *Client Presentations:
AR presentations provide clients with an interactive and engaging way to experience the proposed design, aiding in comprehension and decision-making.Choosing the Right iPad Pro
Selecting the appropriate iPad Pro model depends on individual needs:
*Storage Capacity:
Choose a model with sufficient storage based on the anticipated size and complexity of projects. Large projects with numerous 3D models require more storage. *Screen Size:
The larger screen of the 12.9-inch iPad Pro provides more working space, which can be beneficial for detailed drawing. The 11-inch model offers a balance between portability and screen real estate.By understanding the software options, leveraging suitable accessories, and establishing an efficient workflow, users can harness the power of the iPad Pro to create accurate, detailed, and professional house plans.

Two Ways To Draw A Floor Plan From Scratch In Procreate

Draw Floor Plans With The Roomsketcher App

Drawplan On The App

Draw Floor Plans With The Roomsketcher App

Draw Exact Wall Measurements Of Floor Plans With Roomle On Ipad
House Design App 10 Best Home Architecture

Two Ways To Draw A Floor Plan From Scratch In Procreate

House Plans How To Design Your Home Plan

Home Interior Design App For Ios And Ipados Live 3d

House Designer On The App

