Plans for Pallet Cubby House: Building Your Own Backyard Adventure
Pallet cubby houses are a fun and creative way to provide your kids with their own private space for imagination and playtime. Building one yourself is a great opportunity for family bonding and learning basic carpentry skills. With careful planning and attention to detail, you can create a sturdy and visually-appealing cubby house that will provide enjoyment for years. ### 1. Gather Materials Before you start building, make sure you have all the necessary materials: - Several wooden pallets - Nails or screws - Hammer or drill - Saw - Sandpaper - Paint or sealant - Waterproofing material (optional) ### 2. Design Your Cubby House Spend some time planning the design of your cubby house. Consider the size, shape, and features you want to incorporate. Some common elements include: - A raised platform - A roof - Windows and doors - A deck or balcony ### 3. Prepare the Pallets Inspect the pallets for any damaged or unstable boards. Remove any nails or screws that may be protruding. Sand the pallets to remove any rough edges or splinters. ### 4. Construct the Frame Start by building the frame of the cubby house. Use the pallets to create the walls and roof. Attach the pallets together using nails or screws. Make sure the frame is sturdy and stable. ### 5. Add the Roof Cut the pallets to size for the roof. Attach the roof panels to the frame using nails or screws. Ensure that the roof is waterproof by covering it with tar paper or another waterproofing material. ### 6. Install Windows and Doors Cut out openings for the windows and doors. Attach window frames and doors to the openings. Make sure the windows and doors open and close smoothly. ### 7. Add a Deck or Balcony If you want to add a deck or balcony to your cubby house, attach the necessary supports to the frame. Use pallets or other materials to create the deck or balcony. ### 8. Sand and Paint Sand the entire cubby house to smooth out any rough edges. Apply paint or sealant to protect the wood and give it a finished look. ### 9. Furnish the Cubby House Once the cubby house is complete, you can furnish it with pillows, blankets, and toys. You can also add decorations such as curtains, rugs, and plants. ### 10. Enjoy! The best part of building a pallet cubby house is seeing your kids enjoy it. Watch as they create their own adventures and spend hours lost in imagination. ### Safety Tips: - Always wear safety glasses when working with power tools. - Make sure the cubby house is sturdy and stable before allowing children to play in it. - Inspect the cubby house regularly for any signs of damage or wear and tear. - Apply a sealant or weatherproof coating to the cubby house to protect it from the elements.
Pallet Cubby House Recycled Creations South Aust Creati Diy Tree Houses Kids

Diy Rustic Wooden Pallet Cubby Houses Pallets Designs Backyard Projects

Pallet Cubby House Playhouse Ideas Easy

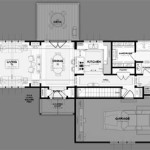
Free Pallet Playhouse Plan Diy Project House Wooden Projects

D I Y Cubby House Using Recycled Pallet Bunnings Work Community

How We Built Our Pallet Playhouse By Kids

Pallet Cubby House With Inbuilt Planter Recycled Creations South Outdoor Projects Furniture

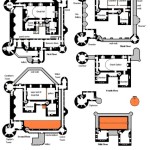
Épinglé Sur Pallett Housing

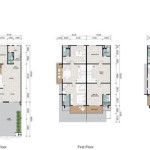
25 Free Diy Pallet Playhouse Plans And Ideas Tree House Kids Garden Outdoor Projects

Building A Pallet Playhouse