How to Create a House Plan in AutoCAD: A Comprehensive Guide
AutoCAD is a powerful design software widely used by architects, engineers, and designers for creating detailed technical drawings. If you're looking to create a house plan in AutoCAD, this guide will provide you with a step-by-step overview of the essential aspects to consider.
1. Preparation
Before starting with AutoCAD, gather all the necessary information and materials. This includes measurements, site conditions, and any specific requirements or preferences. Additionally, familiarize yourself with the AutoCAD interface and basic drawing commands.
2. Setting Up the Drawing
Create a new drawing file in AutoCAD and set up the units and precision to match your project requirements. Use the "Units" command to define the unit type and the "Limits" command to set the drawing area boundaries.
3. Creating the Floor Plan
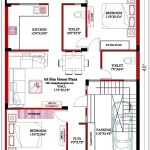
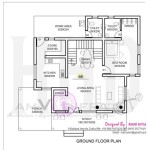
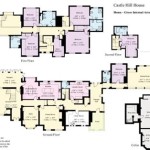
Start by defining the perimeter walls using the "Line" command. Draw exterior walls first, then interior walls and partitions. Use the "Offset" command to create parallel walls at specific distances. Insert windows and doors using the "Insert" command.
4. Adding Details
Add additional elements to the floor plan, such as furniture, fixtures, appliances, and stairs. Use blocks or symbols to represent these elements for faster and more efficient drawing. Label rooms and spaces to clarify their purpose.
5. Creating Elevations
Elevations show the vertical sections of the house. Create elevations by extending the walls vertically and adding openings, windows, and doors. Use the "Section" command to cut through the model and generate elevation drawings.
6. Creating Sections
Sections provide a cross-sectional view of the house. Draw a cutting plane using the "Line" command and use the "Section" command to create cross-sectional drawings. Sections show structural elements, interior details, and construction details.
7. Annotation and Dimensioning
Add annotations to the drawings to provide additional information. Use text, notes, and symbols to indicate specific features, materials, or construction details. Dimension the drawings to clearly convey the size and scale of the house.
8. Exporting and Sharing
Once the house plan is complete, you can export it to various file formats. AutoCAD supports exporting to DXF, DWG, PDF, and other CAD formats. You can also share the plan with others via email or collaboration platforms.
Conclusion
Creating a house plan in AutoCAD requires careful planning, attention to detail, and an understanding of the software's capabilities. By following these steps, you can create professional-quality house plans that accurately represent your design intent. Remember to practice regularly to improve your proficiency in AutoCAD and produce high-quality drawings.

Making A Simple Floor Plan In Autocad Part 1 Of 3

Basic Floor Plan Drafting In Autocad 7 Steps Instructables

How To Draw Floor Plans In Autocad Edrawmax

Autocad Drawing And Coohom Design 3d Fast Rendering Blog

First Floor Plan Of Residence Detail Presented In This Autocad Drawing File 2d Auto Cad Ca Layout

Is Autocad The Best Floor Plan For Estate Agents Elements Property

Floor Plan Create 2d 3d Plans Autodesk

33 5 X45 Amazing 2bhk East Facing House Plan As Per Vastu Shastra Autocad Dwg And File Details Cad Free Plans Budget

How To Draw Floor Plans In Autocad Edrawmax

32 Autocad Small House Plans Drawings Free Design Home Floor Modern Plan

