Creating My Own Floor Plans: A Comprehensive Guide
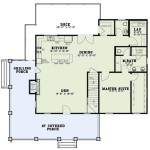
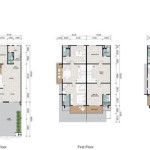
Designing your dream home or renovating your existing one requires careful planning, and creating a floor plan is a crucial step in this process. Floor plans serve as a blueprint for your living space, allowing you to visualize the layout, room sizes, and flow of your home before construction begins.
Understanding Floor Plan Basics
A floor plan is a scaled drawing that represents the layout of a property's interior. It typically includes the following elements:
* Room dimensions and shapes * Wall locations and door/window openings * Furniture placement (optional) * Utilities, such as plumbing and electrical fixturesBenefits of Creating Your Own Floor Plans
Creating your floor plans offers several advantages:
* Control over design: It allows you to customize your home to meet your specific needs and preferences. * Cost savings: Hiring an architect or designer can be expensive, while DIY floor plans can save you money. * Improved visualization: Floor plans provide a clear understanding of how your home will look and function. * Easier communication: Floor plans facilitate communication with contractors and builders throughout the construction process.Software Options for DIY Floor Plans
Numerous software options are available for creating floor plans, both free and paid. Some popular choices include:
* SketchUp: A user-friendly tool for 3D floor planning. * Floorplanner: An online platform with a range of pre-designed templates. * Sweet Home 3D: Free software that allows you to create realistic floor plans and virtual tours. * RoomSketcher: A paid option with advanced features for professional-level floor plans.Steps for Creating Your Floor Plans
Follow these steps to create your floor plans:
1. Gather measurements: Accurately measure your existing space or the footprint of your new home. 2. Choose a software: Select a software that suits your needs and budget. 3. Create a rough sketch: Draw a basic layout of your floor plan on paper to get started. 4. Input measurements: Enter the measurements of your rooms, walls, and other elements into the software. 5. Arrange furniture (optional): If desired, you can include furniture in your floor plan for a better understanding of space allocation. 6. Add details: Include door and window openings, electrical outlets, and other relevant details. 7. Review and refine: Carefully review your floor plan and make any necessary adjustments before finalizing it.Tips for Effective Floor Plans
Consider these tips for creating effective floor plans:
* Focus on functionality: Design a layout that optimizes space, flow, and accessibility. * Consider traffic patterns: Plan for smooth movement between rooms and minimize bottlenecks. * Ensure adequate natural light: Position windows to maximize daylighting and reduce energy consumption. * Plan for storage: Incorporate built-in storage solutions to keep your home organized and clutter-free. * Design with flexibility in mind: Allow for future changes by including open spaces or adjustable walls.
Floor Plan Creator And Designer Free Easy App

Floor Plan Creator And Designer Free Easy App

Designing My Own House

House Plans How To Design Your Home Plan

Create 2d 3d Floor Plans For Free With Floorplanner

House Plans How To Design Your Home Plan

Floor Plan Creator And Designer Free Easy App

Floor Plan Creator Planner 5d

House Plans How To Design Your Home Plan

My Own House Design Model Free 3d Floor Plans By Planner 5d


