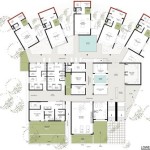
AutoCAD Floor Plan Tutorial for Beginners: A Comprehensive Guide
AutoCAD is a powerful computer-aided design (CAD) software used in various industries including architecture and engineering. Creating floor plans in AutoCAD is a fundamental skill for professionals. This tutorial will guide beginners through the essential aspects of creating a floor plan in AutoCAD.
1. Setup and Unit Selection
Begin by setting up the AutoCAD environment to align with project requirements. Open AutoCAD and from the "Drawing Setup" tab, select the appropriate unit of measurement (e.g., architectural inches, metric units). This will ensure measurements are displayed and entered correctly.
2. Creating Walls
Walls form the foundation of any floor plan. Use the "Line" tool to draw the outline of each wall. Alternatively, the "Wall" tool provides additional control over wall thickness and height. To create a wall, select the "Wall" tool, specify the thickness, and click to define the start and end points of the wall.
3. Adding Doors and Windows
Doors and windows are crucial elements for functionality and aesthetics. Use the "Insert" tab and select "Blocks" to access the library of pre-defined objects. Drag and drop the desired door or window block into the floor plan and position it accordingly.
4. Inserting Furniture and Objects
To add detail to the floor plan, insert furniture and other objects. Use the "Insert" tab and select "Blocks" to browse the available library. Alternatively, create custom objects using the AutoCAD drawing tools.
5. Labeling and Annotations
Clear labeling and annotations are essential for conveying information in the floor plan. Use the "Text" tool to add labels and annotations to indicate room names, dimensions, or other relevant details.
6. Dimensioning
Accurate dimensions are vital for construction purposes. Use the "Dimension" tool to create linear, radial, or angular dimensions. Select the entities to dimension, specify the dimension style, and click to place the dimension.
7. Printing and Exporting
Once the floor plan is complete, it needs to be printed or exported for sharing or documentation purposes. From the "File" tab, select "Print" to preview and print the floor plan. Additionally, the floor plan can be saved in AutoCAD format (DWG) or exported to other file formats like PDF, JPG, or PNG.
Additional Tips for Beginners
- Use layers to organize different elements of the floor plan.
- Utilize the "Snap" and "Ortho" modes to ensure precision.
- Practice regularly to enhance proficiency in AutoCAD.
- Refer to online tutorials and documentation for additional guidance.
- Remember, AutoCAD is a versatile tool that allows for customization and creativity.
Conclusion
Creating a floor plan in AutoCAD is a valuable skill for architects, engineers, and designers. By following the steps outlined in this tutorial, beginners can lay the foundation for creating accurate and detailed floor plans. Remember to practice consistently, explore additional resources, and leverage the versatility of AutoCAD to enhance your design capabilities.

Autocad Simple Floor Plan For Beginners 2 Of 5

Making A Simple Floor Plan In Autocad Part 2 Of 3

Autocad Floor Plan Tutorials For Beginners

How To Set Up Basic Settings In Autocad Floor Plan Tutorial For Beginners Lesson 2

Basic Floor Plan Drafting In Autocad 7 Steps Instructables

Autocad 2d Basics Tutorial To Draw A Simple Floor Plan Fast And Efective Part 1

Autocad Complete Floor Plan For Beginners Exercise Care Home

Autocad Tutorial Site Layout Exercise 2 Cadtutor

How To Draw Floor Plan In Autocad 2d Simple Easy 5 Steps Part 1 A Tutorials 45

How To Draw Floor Plans In Autocad Edrawmax

