How To Draw a Room Plan
Drawing a room plan, also known as a floor plan, is a fundamental skill for interior designers, architects, real estate professionals, and even homeowners embarking on renovation projects. A well-executed room plan provides a scaled, bird's-eye view of a space, illustrating the arrangement of walls, doors, windows, and furniture. It serves as a crucial tool for visualizing spatial relationships, optimizing layouts, and ensuring that design concepts are practical and aesthetically pleasing. This article details the process of creating an accurate and informative room plan.
The initial stages of room plan creation involve gathering necessary materials and understanding the existing space. Before any lines are drawn, accurate measurements must be obtained. Precision is paramount; even small discrepancies can accumulate and compromise the overall accuracy of the plan. Therefore, investing in reliable measuring tools is essential.
The primary tool for measuring is a laser distance measurer. These devices provide accurate readings quickly and efficiently, particularly for larger spaces. A traditional measuring tape can be used for smaller spaces or to verify laser measurements. A notebook and pencil are indispensable for recording measurements and sketching a rough outline of the room. Graph paper, preferably with a scale appropriate for the room size (e.g., ¼ inch or ½ inch representing 1 foot), is used for creating the scaled drawing. Finally, an eraser, sharpener, and a straight edge (ruler or T-square) will ensure neatness and precision.
Prior to measuring, a preliminary sketch of the room's outline should be made. This sketch does not need to be perfectly to scale but should accurately represent the general shape of the room and the positions of walls, doors, and windows. This sketch serves as a visual aid for organizing measurements and minimizing errors. It also allows for quick note-taking regarding specific features or potential obstacles within the space.
The measurement process begins with the longest walls of the room. Measure each wall multiple times to ensure accuracy and record the figures on the preliminary sketch. Pay meticulous attention to inside corner measurements and ensure the measuring device is flush against the wall. Note any irregularities in wall lengths or angles. Measure the positions of doors and windows along the walls. Record the width of each door and window, as well as their distance from the corners of the room. Measure the height of windowsills from the floor. Note the direction in which doors swing, as this will affect furniture placement. Measure the thickness of walls, especially interior walls, which may differ from exterior walls. Account for any architectural features, such as fireplaces, built-in shelves, or columns. Measure the dimensions and positions of these features carefully.
Key Point 1: Accurate Measurement Techniques
Accurate measurement is the bedrock of a successful room plan. Several techniques can ensure precision. Always measure from the inside corners of the room to avoid accounting for baseboards or trim. When measuring the length of a wall, take multiple measurements along its length to identify potential variations. If a wall is not perfectly straight, divide it into segments and measure each segment separately. For window and door measurements, measure the opening itself, not just the frame. Note the height of windows from the floor, as this affects furniture placement underneath them. When measuring doorways, account for the door frame and the door swing direction. Accurate measurements of architectural features are equally critical. For fireplaces, measure the width, depth, and height of the hearth, firebox, and mantel. For built-in shelves, measure the overall dimensions as well as the shelf spacing. For columns, measure the diameter or width and height. The accuracy of these measurements directly impacts the usability and effectiveness of the final room plan.
Once all measurements have been recorded, the process of transferring these measurements to graph paper begins. Choose an appropriate scale for the drawing based on the size of the room and the size of the graph paper. Common scales include ¼ inch representing 1 foot or ½ inch representing 1 foot. A smaller scale may be necessary for large rooms, while a larger scale allows for greater detail in smaller rooms. Mark the corners of the room on the graph paper, referencing the measurements in the notebook. Use a straight edge to connect the corner points, creating the outline of the room's walls. Double-check the measurements against the outline, ensuring that the proportions are accurate.
Next, add the positions of doors and windows to the drawing. Using the recorded measurements, mark the locations of the openings on the walls. Draw the doors and windows to scale, indicating their width and height. Remember to indicate the direction in which doors swing, as this is crucial for planning furniture placement. Represent windows with a single line or a series of lines to indicate the glass pane. Represent doors with an arc indicating the swing direction.
Accurately representing walls is paramount. Use a consistent line weight to draw the walls, distinguishing them from other elements in the plan. Identify and indicate the thickness of the walls. Interior walls are typically thinner than exterior walls, so ensure that this difference is reflected in the drawing. Use a different line style or shading to differentiate between load-bearing walls and non-load-bearing walls. Indicate any openings or archways in the walls. These openings affect the flow of space and must be accurately represented. Ensure walls meet at right angles unless otherwise specified in the room's actual construction. Any angles other than 90 degrees must be measured accurately and transferred to the drawing with precision.
Key Point 2: Accurate Rendering of Architectural Details
Beyond the basic room outline, accurately rendering architectural details is crucial for creating a usable and informative room plan. Elements like fireplaces, built-in shelves, radiators, and electrical outlets significantly impact space planning and furniture arrangement. For fireplaces, draw the hearth, firebox, and mantel to scale. Indicate the materials used in the fireplace construction. For built-in shelves, draw the shelves to scale, indicating the shelf spacing. Note the material and finish of the shelves. Radiators and other heating or cooling units must be accurately depicted, including their dimensions and location relative to walls and windows. Indicate the type of unit (e.g., baseboard heater, radiator, register). Electrical outlets and switches should be indicated using standard symbols. Indicate the type of outlet (e.g., standard outlet, GFCI outlet) and its location on the wall. By accurately representing these details, the room plan becomes a valuable tool for visualizing the space and planning renovations or redecorating projects.
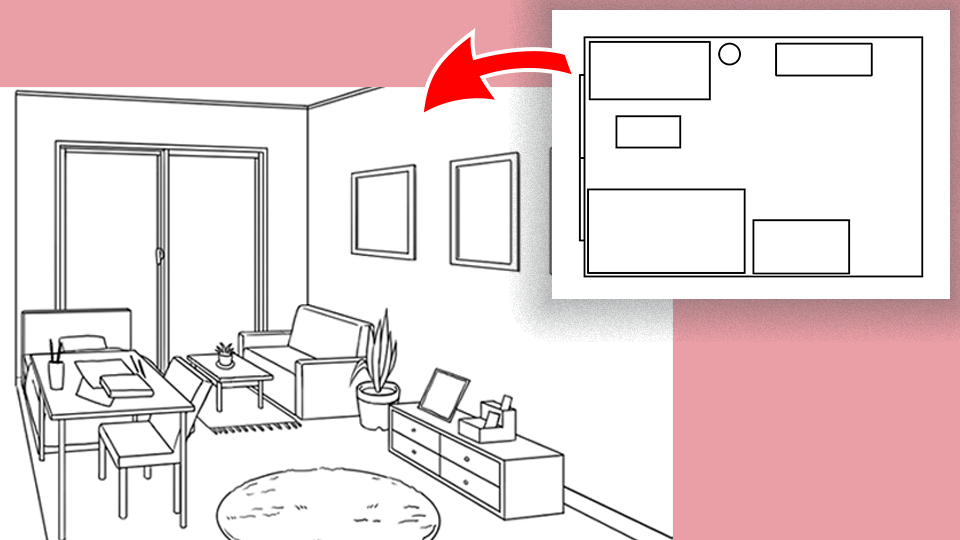
Once the basic structure of the room and its architectural features are in place, furniture can be added to the plan. Select furniture pieces that are representative of the actual furniture that will be placed in the room. Measure the dimensions of each furniture piece and transfer these measurements to the plan using the chosen scale. Use simple shapes to represent furniture pieces, such as rectangles for sofas and beds, and circles for tables. Arrange the furniture in the plan to explore different layout options. Consider the flow of traffic through the room and ensure that there is adequate space for movement. Pay attention to the placement of furniture relative to doors, windows, and other architectural features. Experiment with different arrangements until a functional and aesthetically pleasing layout is achieved.
Labeling the room plan is essential for clarity and usability. Label each wall with its length. Label the dimensions of doors and windows. Label the locations of electrical outlets, switches, and other fixtures. Label the furniture pieces. Include a scale legend on the plan, indicating the scale used for the drawing. Add notes to the plan to provide additional information, such as ceiling height, wall finishes, or lighting fixtures. A well-labeled room plan is easily understood and provides valuable information to anyone using it.
Once the room plan is complete, it should be reviewed for accuracy and completeness. Check all measurements against the original measurements to ensure that there are no errors. Review the placement of doors, windows, and furniture to ensure that they are accurately represented. Verify that all architectural details are included. Make sure that the plan is clearly labeled and easy to understand. If possible, have someone else review the plan for errors or omissions. A thorough review will ensure that the room plan is accurate and reliable.
Key Point 3: Integrating Furniture Layout and Labeling
The integration of furniture layout and clear labeling transforms a basic room plan into a practical design tool. When planning the furniture layout, consider the room's function and optimize the arrangement for its intended use. Draw furniture to scale, representing the actual dimensions of each piece. Use simple shapes, such as rectangles and circles, to represent furniture items. Experiment with different arrangements to optimize space usage and traffic flow. Ensure that there is adequate space for walking around furniture. Consider the placement of furniture relative to windows and doors. Avoid blocking windows with tall furniture that obstructs natural light. Ensure that doors can swing freely without hitting furniture. Label all furniture items clearly, using abbreviations if necessary to conserve space. Incorporate a scale legend indicating the scale used in the drawing (e.g., ¼ inch = 1 foot). Label each wall with its length. Denote the dimensions of windows and doors. Add annotations to describe specific features or design considerations, such as ceiling height or wall finishes. Consistent labeling improves the plan's clarity and enables effective communication of the design concept.
Creating a room plan is an iterative process that may require multiple revisions. As furniture is added and different layouts are explored, adjustments to the plan may be necessary. Don't hesitate to erase and redraw elements as needed. It's often helpful to create multiple versions of the plan, each with a different furniture layout. This allows for comparing different options and selecting the best one. Using a digital room planning tool can simplify the revision process. Digital tools allow for easy editing and rearranging of elements, making it easier to experiment with different layouts. Experiment with different scales and drawing techniques to find what works best. Some designers prefer to use a smaller scale to create a more detailed plan, while others prefer a larger scale for ease of reading. Adapt the drawing techniques to suit the specific needs of the project and the personal preferences of the designer.

Floor Plans Learn How To Design And Plan

Draw A Room From The Floor Plan Medibang Paint Free Digital Painting And Manga Creation

How To Draw A Floor Plan Dummies

How To Draw A Floor Plan As Beginner Edrawmax

How To Measure And Draw A Floor Plan Inspired Design Talk Plans Modular Sectional Sofa

Draw Floor Plans With The Roomsketcher App

Create Professional 2d And 3d Floor Plans

How To Create A Room Layout Journey Home Canberra

Upload Draw From Or Trace Over A Blueprint Roomsketcher

Draw A Room From The Floor Plan Medibang Paint Free Digital Painting And Manga Creation
Related Posts


