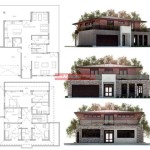
How to Draw a Simple Floor Plan in AutoCAD
AutoCAD is a computer-aided design (CAD) software application for 2D and 3D design and drafting. It is widely used by architects, engineers, and other professionals to create precise and detailed drawings.
If you're new to AutoCAD, drawing a simple floor plan can be a great way to get started. Here's a step-by-step guide to help you draw a simple floor plan in AutoCAD:
1. Start a New Drawing
Open AutoCAD and click on the "File" menu. Select "New" to create a new drawing. A new drawing window will open.
2. Set Up the Drawing Units
The default drawing units in AutoCAD are inches. If you want to use different units, such as feet or meters, you need to change the drawing units. Click on the "Format" menu and select "Drawing Units". In the "Drawing Units" dialog box, select the desired units from the "Length" drop-down list.
3. Draw the Walls
To draw the walls, use the "Line" command. Click on the "Home" tab and select the "Line" tool. Move the cursor to the starting point of the wall and click once. Move the cursor to the end point of the wall and click again. Continue drawing the walls until you have completed the outline of the floor plan.
4. Add Doors and Windows
To add doors and windows, use the "Insert" menu. Click on the "Insert" menu and select "Block". In the "Insert Block" dialog box, browse to the location of the door or window block that you want to insert. Click on the door or window block and click "OK". Move the cursor to the location where you want to insert the door or window and click once. The door or window will be inserted into the drawing.
5. Add Furniture
To add furniture, use the "Insert" menu. Click on the "Insert" menu and select "Block". In the "Insert Block" dialog box, browse to the location of the furniture block that you want to insert. Click on the furniture block and click "OK". Move the cursor to the location where you want to insert the furniture and click once. The furniture will be inserted into the drawing.
6. Set the Wall Thickness
To set the wall thickness, use the "Properties" palette. Select the walls that you want to change the thickness of. In the "Properties" palette, find the "Thickness" property and enter the desired thickness.
7. Add Dimensions
To add dimensions, use the "Dimension" command. Click on the "Annotate" tab and select the "Dimension" tool. Move the cursor to the first point of the dimension and click once. Move the cursor to the second point of the dimension and click again. The dimension will be added to the drawing.
8. Save the Drawing
When you have finished drawing the floor plan, save the drawing by clicking on the "File" menu and selecting "Save". In the "Save As" dialog box, enter a name for the drawing and click "Save".
Here are some additional tips for drawing simple floor plans in AutoCAD:
- Use layers to organize your drawing. Layers allow you to group different elements of the drawing, such as walls, doors, windows, and furniture.
- Use the "Snap" tools to help you draw accurately. The "Snap" tools allow you to snap to specific points on the drawing, such as the endpoints of lines or the centers of circles.
- Use the "Trim" and "Extend" commands to clean up your drawings. The "Trim" and "Extend" commands allow you to trim or extend lines and arcs to meet other objects.

How To Draw Floor Plans In Autocad Edrawmax

Making A Simple Floor Plan In Autocad Part 2 Of 3

How To Draw Floor Plans In Autocad Edrawmax

How To Draw Autocad Floor Plan Cad Cam Blog

Making A Simple Floor Plan In Autocad Fantasticeng

Autocad 2d Basics Tutorial To Draw A Simple Floor Plan Fast And Effective Part 2

Autocad Simple Floor Plan For Beginners 1 Of 5

How To Make House Floor Plan In Autocad Fantasticeng

Autocad Tutorial Draw A House Floor Plan Free Cad Blocks In Dwg File Format

How To Draw Floor Plans In Autocad Edrawmax


