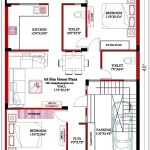
How To Create A Floor Plan In Excel
Creating a floor plan offers a visual representation of a space, whether for interior design, renovation, or real estate purposes. While specialized software exists for this task, Microsoft Excel provides a surprisingly versatile platform for constructing basic floor plans. This article outlines the steps involved in leveraging Excel's grid-based system and formatting capabilities to create accurate and visually appealing floor plans.
The primary advantage of using Excel lies in its availability and familiarity for many users. It eliminates the need to learn a new, complex software program. Furthermore, its grid structure lends itself naturally to measuring and scaling elements within a floor plan. The following sections will guide the user through setting up the worksheet, drawing walls and adding elements, and formatting the plan for clarity and visual appeal.
Setting Up the Excel Worksheet for Floor Plan Creation
The initial step involves preparing the Excel worksheet to function effectively as a drafting board. This includes adjusting row heights and column widths to create a uniform grid, which will serve as the basis for measuring and drawing the floor plan.
First, open a new Excel worksheet. Select all cells by clicking the triangle located at the intersection of the row and column headers. Next, right-click on any column header and select “Column Width.” In the dialog box, enter a value that approximates the desired size for a square grid unit. A common value is around 2. Similarly, right-click on any row header and select "Row Height." Enter a value that is approximately equal to the column width value. Experimentation or adjustments may be necessary to achieve a visually square grid.
This uniform grid establishes a scale for the floor plan. Each cell now represents a specific unit of measurement, such as one inch, one foot, or one meter, depending on the desired scale. This allows users to translate real-world dimensions into cell units within the Excel worksheet. It is crucial to note the chosen scale for accurate representation throughout the floor plan design process.
To further refine the grid, consider enabling gridlines. While these are displayed by default, they can be toggled on or off via the "View" tab on the Excel ribbon. Ensure that the "Gridlines" checkbox is selected for improved visual guidance when drawing walls and placing elements. The gridlines aid in precise alignment and measurement within the floor plan.
Finally, consider adding labels to the rows and columns. Use Row 1 and Column A to indicate the units. This step is not required, but it allows the user to quickly know the dimensions of the design. For example, if each cell represents 1 foot, Label A1, A2 and A3 as 1ft, 2ft, and 3ft. This will quickly allow the user to reference dimensions of the room.
Drawing Walls and Adding Architectural Elements
With the worksheet prepared, the next step involves drawing the walls and adding key architectural elements. This can be achieved using Excel's cell border formatting and shape insertion tools.
To draw walls, select a range of cells that correspond to the length and thickness of the desired wall. For instance, if a wall is 20 feet long and the chosen scale is one foot per cell, select a row of 20 cells. To represent wall thickness, select one or two rows of cells. Then, navigate to the "Home" tab and locate the "Font" group. Click the dropdown arrow next to the "Borders" button and choose the "Outside Borders" option or "All Borders." This will outline the selected cells, creating the appearance of a wall. Repeat this process to draw all exterior and interior walls of the floor plan.
For doors and windows, utilize the shape insertion tools. Go to the "Insert" tab and click "Shapes." Choose a rectangle shape and draw it on the floor plan to represent a door or window opening. Adjust the size and position of the rectangle as needed. To indicate the door swing arc, use the "Arc" shape also found in the "Shapes" menu. Adjust the curve to match the opening size. Set the line color and weight to match the wall lines for visual consistency.
To add elements such as furniture, appliances, and fixtures, utilize a similar approach. Choose appropriate shapes from the "Shapes" menu or create custom shapes by combining multiple shapes. For example, a sofa can be represented by a rectangle with rounded corners. Adjust the size, color, and orientation of these elements to accurately reflect their placement within the floor plan. Grouping several shapes together allows a user to more easily move an entire piece of furniture, without having to adjust multiple shapes.
Consider using text boxes to label rooms and elements. Insert a text box from the "Insert" tab and type the desired label, such as "Living Room" or "Bedroom." Position the text box appropriately within the floor plan and adjust the font size and style for readability. Use the "Fill Color" and "Outline" settings to create a more professional look.
Formatting and Refining the Floor Plan
After drawing the walls and adding elements, formatting and refinement are crucial for enhancing clarity and visual appeal. This involves adjusting colors, line weights, and adding annotations.
To distinguish between different wall types or materials, utilize Excel's cell fill color. Select the cells representing a wall and choose a color from the "Fill Color" dropdown in the "Font" group on the "Home" tab. Different colors can represent load-bearing walls, partition walls, or walls made of different materials. Consistent color coding enhances the readability of the floor plan.
Adjust the line weight of the wall borders to make them more prominent. Select the cells representing a wall, go to the "Borders" dropdown, and choose "Line Style." Select a thicker line weight to make the walls stand out from other elements in the floor plan. This enhances the visual hierarchy and makes the walls the focal point of the design.
Add dimensions and annotations to provide precise measurements and additional information. Use the "Insert" tab to insert shapes, such as lines and arrows, to indicate dimensions. Add text boxes to label the dimensions with specific measurements. Ensure that the dimensions are accurate and clearly legible. Annotations can also be used to indicate ceiling heights, material specifications, or other relevant details.
Finally, consider removing the gridlines for a cleaner, more professional look. Go to the "View" tab and uncheck the "Gridlines" checkbox. This will hide the worksheet grid, leaving only the walls and elements visible. This creates a polished presentation of the floor plan.
Using Excel to design a floor plan requires a measured approach and careful attention to detail. The grid-based system, combined with Excel’s formatting options, enables users to create functional and visually understandable plans. Remember that this method is most suitable for basic floor plans. For more complex architectural drawings, specialized software remains the preferred solution.

3 Ways To Draw And Create A Floorplan In Excel Like Cad With Examples

How To Make Create A Floor Plan On Microsoft Excel Templates Examples 2024

How To Create A Floor Plan Using Excel

How To Draw A Floorplan Scale In Excel House Design Ideas C75 Create Floor Plan Free Plans Warehouse

3 Ways To Draw And Create A Floorplan In Excel Like Cad With Examples

How To Make Create A Floor Plan On Microsoft Excel Templates Examples 2024

3 Ways To Draw And Create A Floorplan In Excel Like Cad With Examples

Create Floor Plan Using Ms Excel 5 Steps With Pictures Instructables

Floor Plan Excel Template Simple Spreadsheet To Draw

Automated Floor Plan Template Plans Excel Templates Creator

