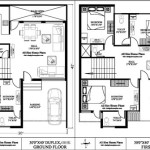
Chapter 1: Getting Started with AutoCAD 2017 2D Floor Plan Tutorial for Beginners
Introduction
AutoCAD is a powerful computer-aided design (CAD) software widely used by architects, engineers, and drafters to create 2D and 3D drawings. In this beginner's tutorial, we'll focus on creating a basic 2D floor plan using AutoCAD 2017. We'll cover the essential tools and techniques you need to get started, from setting up your workspace to drawing walls and inserting furniture.Topics Covered:
1. Setting Up the AutoCAD Interface 2. Understanding the Coordinate System 3. Creating a New Drawing 4. Drawing Walls and Windows 5. Adding Doors 6. Inserting Furniture1. Setting Up the AutoCAD Interface:
* Launch AutoCAD 2017 and familiarize yourself with the user interface. * Customize your workspace by arranging the toolbars and panels according to your preference. * Set the units and precision for your drawing.2. Understanding the Coordinate System:
* AutoCAD uses a Cartesian coordinate system with X and Y axes. * The origin (0,0) is located at the bottom-left corner of the drawing area. * Positive X values increase to the right, and positive Y values increase upward.3. Creating a New Drawing:
* Start a new drawing by clicking the "New" button or using the keyboard shortcut "Ctrl+N." * Select the appropriate template for your project, such as "Architectural" or "Engineering." * Set the drawing units and precision.4. Drawing Walls and Windows:
* Use the "Line" tool to draw the walls of your floor plan. * Set the wall thickness and color. * Use the "Rectangle" tool to draw windows and doors. * Adjust the size and position of windows and doors as needed.5. Adding Doors:
* Use the "Door" tool to insert doors into your floor plan. * Select the type and swing direction of the door. * Position the door within the wall opening.6. Inserting Furniture:
* Use the "Insert" tab to browse and select furniture blocks. * Drag and drop the furniture blocks into your floor plan. * Rotate and scale the furniture as needed.Conclusion:
In this chapter, we've covered the basics of creating a 2D floor plan in AutoCAD 2017. We've learned how to set up the interface, understand the coordinate system, start a new drawing, draw walls and windows, add doors, and insert furniture. With practice and exploration, you'll become more proficient in using AutoCAD for various design projects. In the upcoming chapters, we'll delve deeper into advanced topics such as layers, dimensions, text, and more to help you create comprehensive and accurate floor plans.
Autocad 2d Floor Plan Complete Course For Beginners 2024

Autocad 2024 Basic 2d Floor Plan For Beginner Complete

Autocad 2024 Basic 2d Floor Plan For Beginner Complete

Making A Simple Floor Plan With S In Autocad 2024 Part 7 Elevation Of

Draw Floor Plan And Elevation Using Basic Autocad Commands Acad Systems Autodesk Gold Partner Training Certification Center

Basic Floor Plan Drafting In Autocad 7 Steps Instructables

Create Floor Plans With Autocad Lt Acad Systems Autodesk Gold Partner Training Certification Center

Autocad Make Your 2d Design With Udemy

Autocad 2024 Tutorial Making A Simple Floor Plan In 2d Drawing

How To Make House Floor Plan In Autocad Fantasticeng

