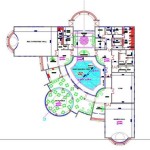
Essential Aspects of AutoCAD Floor Plan Tutorial
Mastering AutoCAD for floor plan creation is a valuable skill for architects, interior designers, and construction professionals. This tutorial provides a comprehensive guide to the essential aspects of AutoCAD floor plan creation, empowering you to design and document your ideas effectively.
1. Understanding the Interface
Familiarize yourself with AutoCAD's intuitive interface. Locate the command bar, toolbar, workspace, and drawing area. The command bar allows you to enter commands, while the toolbar provides quick access to commonly used tools. Understand the workspace, where layers, objects, and properties are organized.
2. Setting Up Layers
Organization is crucial in floor plan creation. Use layers to separate different elements of your plan, such as walls, doors, windows, and furniture. Label layers clearly and assign colors for easy identification. This structured approach ensures clarity and simplifies editing.
3. Drawing Walls
Start your floor plan by drawing the perimeter walls. Use the "Line" command to create straight lines and the "Arc" command for curved walls. Pay attention to the wall thickness and height, considering the real-world dimensions of your design.
4. Adding Doors and Windows
Insert doors and windows to create openings in your walls. Use blocks or dynamic blocks to insert predefined door and window symbols, which can be scaled and rotated as needed. Adjust the placement and swing direction of doors to ensure functionality in the design.
5. Creating Interior Details
Add interior details to your floor plan, including furniture, fixtures, and appliances. Use the "Polyline" command to create custom shapes, such as countertops or built-in cabinets. Utilize hatch patterns to indicate different materials, such as tile or hardwood flooring.
6. Dimensions and Annotations
Accurately dimension your floor plan using the "Dimension" tools. Add text annotations to label rooms, identify furniture, and specify measurements. This information is essential for construction and installation purposes.
7. Creating Elevations and Sections
Beyond the floor plan, you may need to create elevations and sections. Use the "Section" command to generate vertical cross-sections of your design, showing the heights of walls and other elements. Similarly, use the "Elevation" command to create side views of your floor plan, displaying the facade or other exterior features.
8. Advanced Techniques
As you gain proficiency, delve into advanced techniques such as using blocks, dynamic blocks, and parametric constraints. These features enhance productivity by allowing you to create complex objects and maintain associative relationships between elements.
9. Tips and Tricks
Master AutoCAD floor plan creation with these handy tips and tricks. Learn keyboard shortcuts for faster navigation and editing. Utilize the "Snap" tools to ensure precise object placement. Experiment with different line types and hatch patterns to add visual interest to your plans.
10. Exporting and Sharing
Once your floor plan is complete, export it to various file formats for sharing and further use. Common formats include DWG, PDF, and JPEG. Ensure your floor plan meets industry standards and conforms to the appropriate scales and dimensions for printing or presentation.

Making A Simple Floor Plan In Autocad Part 1 Of 3

Basic Floor Plan Drafting In Autocad 7 Steps Instructables

Autocad Floor Plan Tutorial For Beginners 1

Floorplan Complete Tutorial Autocad Learn

Autocad Simple Floor Plan For Beginners 1 Of 5

Autocad Tutorial Draw A House Floor Plan Free Cad Blocks In Dwg File Format

How To Draw Floor Plans In Autocad Edrawmax

How To Draw Floor Plans In Autocad Edrawmax

14 Beginner Tips To Create A Floor Plan In Revit Pure

Layouts And Plotting In Autocad Tutorial S

