Build Your Own Dog House Plans: A Comprehensive Guide
Providing a comfortable and safe shelter for your beloved canine companion is essential, and building a dog house from scratch offers a rewarding and customizable solution. This comprehensive guide will equip you with the necessary knowledge and steps to construct a sturdy and stylish dog house that will provide your furry friend with a cozy retreat.
1. Planning and Design
Before embarking on the construction process, careful planning is crucial. Consider the following factors:
Dog Size:
Measure your dog's height, length, and width, and ensure the dog house provides ample space for them to stand, turn around, and lie down comfortably.Breed and Temperament:
Certain breeds require specific features, such as insulation for cold climates or ventilation for warmer regions. A dog's temperament will also influence the design, as some breeds are more prone to chewing or digging.Location:
Choose a sheltered location that is protected from direct sunlight, rain, and wind. Ensure the area is well-drained and does not pose a risk of flooding.Materials:
Select materials that are durable, weather-resistant, and easy to work with. Wood, metal, and plastic are common options, each with their own advantages and disadvantages.Style:
Consider the aesthetics of your home and garden when choosing the design of your dog house. There are countless options available, ranging from simple A-frame models to more elaborate structures.
Once these factors have been considered, you can sketch out a detailed plan, including the dimensions, layout, and materials required. It may be helpful to consult online resources or dog house plans for inspiration.
2. Building the Dog House
With a solid plan in place, you can start constructing your dog house. The following steps provide a general outline:
Prepare the Base:
Create a sturdy base using pressure-treated lumber or concrete blocks. Ensure the base is level and large enough to accommodate the dog house.Construct the Walls:
Cut and assemble the walls according to your plan, using appropriate joinery techniques and fasteners. If using wood, consider using a weather-resistant finish, such as paint or stain.Build the Roof:
Construct the roof frame and cover it with roofing materials, such as asphalt shingles, metal sheeting, or cedar shakes. Ensure the roof slopes to facilitate water drainage.Add the Door:
Create a secure and easily accessible door using hinges and a latch. You may want to add a flap or overhang above the door to provide additional weather protection.Insulate and Finish:
If necessary, insulate the dog house to keep your dog warm in cold weather. Finish the interior with a layer of flooring and bedding material.
Throughout the building process, prioritize quality craftsmanship and safety. Invest in durable hardware and ensure all connections are secure. When working with power tools, take necessary precautions to prevent accidents.
3. Encouraging Your Dog to Use the Dog House
Once the dog house is complete, it is time to introduce it to your canine companion. Encourage them to use it with the following tips:
Positive Reinforcement:
Reward your dog with treats or praise when they enter the dog house.Make it Comfortable:
Place familiar bedding or toys inside the dog house to entice your dog to explore it.Gradual Introduction:
If your dog is hesitant, start by placing their bed or a favorite toy near the entrance of the dog house. Gradually move the items closer to the interior over time.Provide Supervision:
Initially, allow your dog access to the dog house under supervision. This will help them become accustomed to the new environment and learn that it is a safe and comfortable space.
With patience and positive reinforcement, your dog will learn to appreciate their cozy new retreat.
In conclusion, building your own dog house offers a rewarding and customizable solution to providing your canine companion with a comfortable and safe shelter. By following these steps and carefully planning and executing the construction process, you can create a durable and stylish dog house that your furry friend will surely love.

14 Diy Dog Houses How To Build A House Plans Blueprints

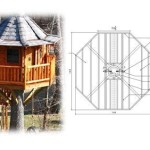
Diy Doghouse Gazebo

13 Diy Doghouse Plans And Ideas The House Of Wood

14 Diy Dog Houses How To Build A House Plans Blueprints

13 Diy Doghouse Plans And Ideas The House Of Wood
:strip_icc()/Beautiful-Pallet-Dog-House-with-Veranda-1-5a202f90494ec90037893a82.jpg?strip=all)
14 Free Diy Dog House Plans Anyone Can Build

14 Diy Dog Houses How To Build A House Plans Blueprints
:strip_icc()/IMG_2589-5a202f1c7d4be800191a3845.jpg?strip=all)
14 Free Diy Dog House Plans Anyone Can Build

8 Diy Dog House Ideas For Crafty Pas

Diy Modern Dog House Plans Outdoor Wooden Luxury Houses Bed Puppy Large Medium


