Cottage Bunk Bed Plans
Cottage bunk beds offer a charming and space-saving solution for rooms with limited space. Their unique aesthetic, often incorporating design elements like shiplap, beadboard, or playful cutouts, can enhance a room's overall appeal while providing practical sleeping arrangements. Building a cottage bunk bed can be a rewarding DIY project, but careful planning and execution are essential. Selecting appropriate plans is the first step in ensuring a successful and structurally sound final product.
Key Considerations When Choosing Cottage Bunk Bed Plans:
Several factors influence the suitability of bunk bed plans. These include skill level, available tools, budget, and the intended user's age and size. A thorough assessment of these factors will help narrow down the options and select a plan that aligns with individual capabilities and requirements.
Skill Level and Tools:
Plans range in complexity from simple designs suitable for beginners to more intricate projects requiring advanced woodworking skills. Beginners should opt for straightforward plans with clear instructions and minimal intricate joinery. More experienced woodworkers can explore plans incorporating challenging techniques like dovetail joints or mortise and tenon construction. The required tools should also be considered. Some plans may necessitate specialized tools like a router or table saw, while others can be completed with basic hand tools.
Budget and Materials:
The cost of materials can vary significantly depending on the chosen wood type and hardware. Softwoods like pine and fir are generally more affordable than hardwoods like oak or maple. Factor in the cost of lumber, screws, glue, and finishing supplies when establishing a budget. Some plans may also incorporate additional features like built-in drawers or shelves, which can impact the overall cost. Carefully review the material list provided in the plans to accurately estimate the total expenses.
Safety and Dimensions:
Safety should be a paramount concern when designing and building a bunk bed. Ensure the plans adhere to safety standards, including appropriate guardrail heights and mattress support systems. The dimensions of the bunk bed should be carefully considered in relation to the room size and the intended user's age and height. Verify that the plans specify appropriate dimensions for mattress size and ensure sufficient headroom on the upper bunk.
Types of Cottage Bunk Bed Plans:
A variety of cottage-style bunk bed plans cater to diverse preferences and needs. Understanding the different styles and configurations can help individuals select the most suitable option.
Twin-over-Twin Bunk Beds:
This classic configuration features two twin-sized beds stacked one above the other. It's a versatile option suitable for children and teenagers sharing a room or for accommodating guests. Twin-over-twin plans are often readily available and adaptable to different cottage-style aesthetics.
Full-over-Full Bunk Beds:
These plans offer more sleeping space with two full-sized beds. This configuration is appropriate for older children, teenagers, or adults sharing a room. Full-over-full bunk beds require a larger footprint than twin-over-twin options and necessitate sturdier construction.
L-Shaped Bunk Beds:
L-shaped bunk beds offer a unique configuration where the lower bunk is perpendicular to the upper bunk, creating an “L” shape. This design can maximize space utilization and create a cozy corner in the room. Some L-shaped designs incorporate additional features like desks or storage underneath the upper bunk.
Loft Bunk Beds with Desk:
These plans combine a lofted bed with a built-in desk underneath, providing a space-saving solution for smaller rooms. This design is particularly suitable for students or individuals who require a dedicated workspace. The desk area can be customized with shelves, drawers, and other organizational features.
Trundle Bunk Beds:
Trundle bunk beds incorporate a hidden bed underneath the lower bunk that can be pulled out for additional sleeping space. This design is ideal for accommodating guests or for families with multiple children. The trundle bed can be stored away when not in use, maximizing floor space.
Finding and Utilizing Cottage Bunk Bed Plans:
Numerous resources offer free and paid cottage bunk bed plans. Online woodworking communities, DIY websites, and woodworking magazines are excellent starting points. Carefully scrutinize the plans before committing to a project, ensuring they provide clear instructions, detailed diagrams, and a comprehensive material list. When utilizing plans, adhere to the specified dimensions and construction techniques to ensure a safe and stable finished product. Consult experienced woodworkers or building professionals if any uncertainties arise during the construction process.

Diy Bunk Beds With Stairs Rustic Crafts Bed Cabin

Little Cottage Loft Bed Ana White

Reader Showcase Kenwood Cabin Bunk Beds The Design Confidential

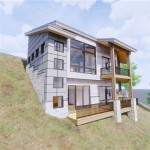
House Bunk Bed Plans Her Tool Belt

Custom Bunk Rooms The New Splurge For Nostalgia Mountain Living

10 Inventive Bunks Cabin Style

Diy Double Bunk Bed Design Plans Beds With Stairs

10 Inventive Bunks Cabin Style

How To Build Diy Built In Bunk Beds Kids Bed Ideas Plans

Rustic Kids Bunk Rooms Log Homes Cabin Decor