Essential Steps to Draw a House Plan in Google SketchUp
Google SketchUp is an intuitive and user-friendly 3D modeling software that allows you to create detailed and realistic house plans. Whether you're an architect, a homeowner, or simply someone who enjoys designing, SketchUp provides powerful tools to help you bring your ideas to life. This article will guide you through the essential steps of drawing a house plan in SketchUp, empowering you to create accurate and visually appealing plans.
Step 1: Set Up Your Drawing Area
Begin by opening SketchUp and setting up your drawing area. Choose the appropriate units (e.g., inches, feet, meters) based on your drawing needs. Set the "Camera" view to "Parallel Projection" and adjust the "Aspect Ratio" to 1:1 to create a flat, two-dimensional drawing surface.
Step 2: Draw the Foundation
Use the "Rectangle" tool to draw the outline of the foundation. Extrude the rectangle to the desired height using the "Push/Pull" tool. This will create the walls of the foundation.
Step 3: Create the Floor Plan
Now, it's time to define the floor plan. Draw the interior walls using the "Line" tool and connect them to the foundation walls. Create openings for doors and windows by erasing sections of the walls.
Step 4: Add Floors and Roof
To create multiple floors, repeat Step 3 for each additional level. Once the floors are complete, use the "Roof" tool to create the desired roof shape. Adjust the roof height and angle as needed.
Step 5: Insert Windows and Doors
To add windows and doors, use the "Insert" menu. Select the appropriate window or door type and drag it into your model. Position the windows and doors according to your plan and adjust their size and shape.
Step 6: Add Details and Dimensions
Once the basic structure is in place, add details to enhance the plan's accuracy and readability. Use the "Component" library to insert furniture, fixtures, and appliances. Additionally, label the rooms and add dimensions using the "Text" tool.
Step 7: Export and Share
When your plan is complete, export it to a suitable format. SketchUp supports various export options, including DWG, PDF, and JPG. You can also share your model directly to Google Drive or 3D Warehouse to collaborate with others.
Tips for Success
- Start with a small project to familiarize yourself with SketchUp.
- Use the "Layers" feature to organize your model and make changes easily.
- Take advantage of the SketchUp Help Center and online tutorials for guidance.
- Experiment with different materials, textures, and lighting to enhance your plan's presentation.
- Collaborate with others to share ideas and receive feedback.
Conclusion
Drawing a house plan in Google SketchUp is a rewarding experience that allows you to visualize and plan your dream home or renovation project. By following these essential steps and utilizing SketchUp's powerful tools, you can create accurate, detailed, and visually appealing house plans. Whether you're a professional or a novice, SketchUp empowers you to bring your design ideas to life.

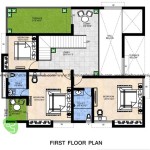
Free Floor Plan Sketchup Review Micro House Plans Drawing

Sketchup Floor Plan Tutorial For Beginners 2

4 Drawing A Basic House Google Sketchup The Missing Manual Book

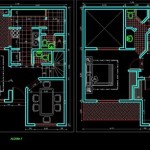
Creating Floorplans Can This Not Be Done More Organically In Sketchup Pro Community

Free Floor Plan Sketchup Review

Plan View 2d Sketchup For Web Community

Sketch Floor Plan To 3d In Sketchup

Sketchup 8 Lessons Making A Simple House

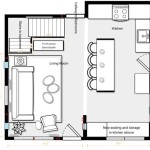
Sketchup Tutorial How To Create A Quick Floor Plan

Sketchup 101 Architecturecourses Org