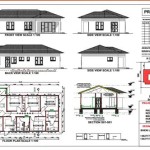
Drawing Floor Plan Layouts: A Comprehensive Guide
A floor plan layout is a scaled diagram of a room or building viewed from above. It is a crucial component in architecture, interior design, real estate, and even for homeowners planning renovations or furniture arrangements. A well-executed floor plan communicates spatial relationships, dimensions, and the placement of key elements like walls, doors, windows, and built-in features. Understanding how to draw a floor plan layout, whether manually or digitally, is fundamental to effective space planning and communication.
The process of creating a floor plan typically involves measuring the space, sketching the existing layout (if applicable), determining the purpose and function of each area, and then translating those ideas into a detailed and accurate representation. This representation serves as a blueprint for construction, renovation, or interior design projects, ensuring that the final result aligns with the intended vision and meets the practical needs of the occupants.
Floor plans are not merely two-dimensional representations; they are vital tools for problem-solving, visualization, and communication among stakeholders involved in a project. They allow architects and designers to explore different spatial configurations, identify potential constraints, and optimize the flow of movement within the space. For homeowners, floor plans provide a tangible way to visualize how furniture will fit, how natural light will impact different areas, and how to best utilize available space.
This article will explore the essential steps involved in drawing a floor plan layout, covering both manual drafting techniques and the use of computer-aided design (CAD) software. It will also delve into key considerations for creating functional and aesthetically pleasing spaces.
Understanding the Necessary Tools and Materials
Before embarking on the process of drawing a floor plan, it is essential to gather the necessary tools and materials. The specific requirements will vary depending on whether the plan is being created manually or digitally. For manual drafting, the following items are typically needed:
- Measuring Tape: A reliable measuring tape is crucial for accurately determining the dimensions of the space. A long tape measure (e.g., 25 feet or longer) is recommended for larger rooms or buildings.
- Graph Paper: Graph paper provides a grid system that simplifies the process of drawing to scale. Choose a scale that is appropriate for the size of the space and the level of detail required. Common scales include 1/4 inch = 1 foot or 1/8 inch = 1 foot.
- Pencils: Use a variety of pencils with different lead hardnesses. A hard pencil (e.g., 2H or 4H) is suitable for faint guidelines and construction lines, while a softer pencil (e.g., HB or 2B) is better for darker lines and shading.
- Eraser: A good quality eraser is essential for correcting mistakes and cleaning up the drawing.
- Ruler or Straightedge: A ruler or straightedge is necessary for drawing straight lines accurately.
- Architect's Scale: An architect's scale is a specialized ruler that is pre-marked with different scales, making it easier to convert measurements directly onto the drawing.
- Compass or Circle Template: These tools are helpful for drawing arcs and circles, which may be required for representing certain architectural features.
For digital drafting using CAD software, the following are required:
- Computer: A computer that meets the minimum system requirements for the chosen CAD software.
- CAD Software: A CAD program such as AutoCAD, SketchUp, Revit, or a free alternative like LibreCAD or FreeCAD.
- Mouse: A computer mouse or trackpad is essential for navigating the software and drawing accurately. A graphics tablet can also be used for more precise drawing.
Regardless of the method chosen, it is important to have a clear understanding of architectural symbols and conventions. These symbols are used to represent various elements such as walls, doors, windows, stairs, and plumbing fixtures in a standardized way, ensuring that the floor plan is easily understood by architects, builders, and other professionals.
Step-by-Step Guide to Creating a Floor Plan
The process of creating a floor plan can be broken down into several key steps. These steps apply whether the plan is being drawn manually or digitally, although the specific tools and techniques will differ.
- Measure the Space: The first step is to accurately measure the dimensions of the space. Begin by measuring the overall length and width of the room or building. Then, measure the length and width of each wall, as well as the dimensions of any recesses, alcoves, or other architectural features. Use a measuring tape to measure the size and placement of doors, windows, and other openings. It is important to record all measurements carefully and accurately, as even small errors can accumulate and affect the overall accuracy of the floor plan.
- Sketch the Existing Layout (Optional): If you are working with an existing space, it is helpful to create a rough sketch of the current layout. This sketch does not need to be drawn to scale, but it should accurately represent the relationships between different elements such as walls, doors, and windows. This sketch will serve as a reference point when you begin drawing the scaled floor plan.
- Choose a Scale: Select an appropriate scale for the floor plan. The scale determines the relationship between the dimensions on the drawing and the actual dimensions of the space. A common scale for residential floor plans is 1/4 inch = 1 foot, meaning that every 1/4 inch on the drawing represents 1 foot in reality. For larger buildings, a smaller scale such as 1/8 inch = 1 foot may be more appropriate. The chosen scale should allow the entire floor plan to fit comfortably on the paper or within the digital workspace.
- Draw the Exterior Walls: Begin by drawing the exterior walls of the space to the chosen scale. Use a ruler or straightedge to ensure that the lines are straight and accurate. Pay close attention to the measurements and ensure that the walls are drawn to the correct length and thickness. The standard thickness varies by building type and materials used.
- Add Interior Walls: Once the exterior walls are in place, add the interior walls, again using the chosen scale and ensuring accuracy. Consider the thickness of the interior walls. Use the sketch and measurements to guide the placement of the walls, paying attention to doorways and openings.
- Draw Doors and Windows: Representing doors and windows requires the use of standard architectural symbols. A door is typically represented as an arc that shows the direction of the door swing, along with a line representing the door itself. Windows are usually represented as two or three parallel lines within the wall, depending on the type of window. Ensure that the doors and windows are drawn to the correct size and placed in the correct location.
- Add Other Architectural Features: Include any other relevant architectural features such as stairs, fireplaces, built-in cabinets, and plumbing fixtures. Use standard architectural symbols to represent these features. For example, stairs are typically represented as a series of parallel lines with an arrow indicating the direction of ascent.
- Label the Rooms and Features: Label each room and feature clearly and accurately. Use a consistent font and size for the labels. Indicate the purpose of each room (e.g., bedroom, bathroom, kitchen) and label any specific features such as closets, cabinets, and appliances.
- Add Dimensions: Add dimensions to the floor plan to indicate the size of each room and the overall dimensions of the space. Use dimension lines and extension lines to clearly indicate the measurements. Place the dimensions in a location where they are easy to read and understand.
For digital floor plans, the process is similar but the tools are different. CAD software allows for the creation of precise drawings using a variety of tools and commands. The software typically includes libraries of pre-drawn architectural symbols, which can be easily inserted into the drawing. CAD software also allows for the creation of layers, which can be used to organize different elements of the floor plan, such as walls, doors, windows, and furniture. The use of layers makes it easier to edit and modify the floor plan as needed.
Key Considerations for Functional and Aesthetically Pleasing Layouts
Creating a floor plan is not just about accurately representing the dimensions of a space; it is also about creating a functional and aesthetically pleasing layout that meets the needs of the occupants. Several key considerations should be taken into account during the design process.
- Traffic Flow: The flow of movement within a space is a critical consideration. The floor plan should allow for easy and natural movement between different areas. Avoid creating bottlenecks or obstacles that could impede traffic flow. Consider the placement of doors and hallways, and ensure that there is adequate space for people to move freely.
- Functionality: Each room should be designed to meet its intended function. Consider the activities that will take place in each room and ensure that the layout supports those activities. For example, a kitchen should be designed with adequate counter space, storage, and appliance placement to facilitate cooking and meal preparation.
- Natural Light: Natural light can significantly impact the ambiance and livability of a space. When designing the floor plan, consider the orientation of the building and the placement of windows to maximize natural light. Ensure that windows are positioned to provide adequate light to the areas where it is most needed.
- Spatial Relationships: The relationships between different rooms should be carefully considered. For example, the kitchen should be located near the dining room for easy serving, and the bedrooms should be located away from noisy areas for privacy and quiet. Consider the adjacencies between different rooms and ensure that they are logical and functional.
- Scale and Proportion: The scale and proportion of the rooms and features should be appropriate for the overall size of the space. Avoid creating rooms that are too small or too large for their intended function. Pay attention to the proportions of the walls, windows, and doors, and ensure that they are visually balanced.
- Accessibility: Consider the needs of all occupants, including those with disabilities. Ensure that the floor plan is accessible to people of all abilities by providing adequate clearances for wheelchairs and other mobility devices. Consider the placement of grab bars in bathrooms and other areas where they may be needed.
By carefully considering these factors, it is possible to create a floor plan that is not only accurate and functional but also aesthetically pleasing and supportive of the occupants' needs. A well-designed floor plan can enhance the quality of life for those who live or work in the space.
The process of drawing a floor plan layout requires precision, attention to detail, and a thorough understanding of architectural principles. Whether drafting manually or using CAD software, the goal is to create a clear, accurate, and informative representation of the space that can be used for planning, communication, and execution of design or construction projects.

Floor Plans Learn How To Design And Plan

Customize 2d Floor Plans

How To Draw Floor Plans Create In 2d And 3d

Create Floor Plan

Home Floor Plans House Plan Drawings

House Plan Drawing Samples 2d Drawings

Draw Floor Plans Create Professional

How To Draw Floor Plans Create In 2d And 3d

Free Floor Plan Creator Design 2d 3d Layouts Easily

How To Draw Floor Plans Create In 2d And 3d

