Drawing House Plans with AutoCAD: Essential Aspects
AutoCAD is a powerful software tool widely used for creating precise and detailed drawings. When it comes to drawing house plans, AutoCAD offers an array of features and functionalities that can streamline the design process. Understanding the essential aspects of drawing house plans with AutoCAD is crucial for creating accurate and efficient designs. This article delves into the key components and considerations involved in using AutoCAD for residential architecture.
1. Understanding Layers
Layers in AutoCAD serve as organizational units within a drawing. Each layer can contain specific elements of the house plan, such as walls, windows, doors, or furniture. By organizing elements into separate layers, users can easily control the visibility, editing, and printing of specific components. This helps maintain clarity and facilitates collaboration with other designers or builders.
2. Utilizing Blocks
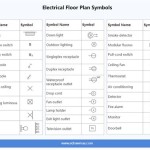
Blocks are reusable symbols that represent commonly used elements in house plans. These can include windows, doors, furniture, or even entire rooms. By creating and inserting blocks, users can save time and effort, as they can easily place and modify these elements throughout the drawing. Blocks also ensure consistency in the design, as they maintain the same properties and dimensions each time they are used.
3. Managing Dimensions
Accurate dimensions are essential for any house plan. AutoCAD provides tools for adding linear, radial, and angular dimensions to drawings. Dimensions can be linked to the geometry of the drawing, ensuring that they update automatically when changes are made. Proper dimensioning not only conveys the exact measurements but also facilitates accurate construction and compliance with building codes.
4. Using Text and Annotations
Text and annotations play a vital role in communicating details in house plans. AutoCAD allows users to add text, notes, symbols, and other annotations to clarify design intent, specify materials, or provide instructions. These elements enhance the readability and comprehension of the plans, making them easier for builders and contractors to interpret.
5. Generating Sections and Elevations
Sections and elevations are essential for visualizing the three-dimensional aspects of a house plan. AutoCAD provides tools for creating both sectional and elevation views. Sections show the interior structure of the building, while elevations depict the exterior appearance from various sides. Generating these views helps in understanding the spatial relationships, verifying dimensions, and ensuring the design meets project requirements.
6. Utilizing Templates and Standards
Starting with a template can save significant time when drawing house plans. AutoCAD offers pre-designed templates that provide a basic framework with common layers and settings. Adhering to industry standards is also important, as it ensures that drawings are consistent and easy to interpret. Using pre-defined symbols, line weights, and dimensioning styles facilitates clear communication and avoids confusion or errors.
7. Collaborating and Sharing
Effective collaboration is crucial in the design process. AutoCAD enables designers to share drawings with colleagues, clients, or contractors. The software supports file sharing through cloud platforms or local networks, allowing multiple users to access and modify drawings simultaneously. This real-time collaboration streamlines the review and approval process, leading to efficient project completion.
By mastering these essential aspects of drawing house plans with AutoCAD, users can create accurate, detailed, and professional-quality designs. From organizing layers to generating elevations, AutoCAD offers a comprehensive toolset that empowers designers to produce plans that meet industry standards and facilitate efficient construction.

Making A Simple Floor Plan In Autocad Part 1 Of 3

How To Draw Floor Plans In Autocad Edrawmax

Basic Floor Plan Drafting In Autocad 7 Steps Instructables

Autocad Drawing And Coohom Design 3d Fast Rendering Blog

32 Autocad Small House Plans Drawings Free Design Home Floor Modern Plan

First Floor Plan Of Residence Detail Presented In This Autocad Drawing File 2d Auto Cad Ca Layout

How To Draw Floor Plans In Autocad Edrawmax

30 X30 House Layout Plan Autocad Drawing Dwg File Cadbull

Architecture House Ground Floor And First Plan Autocad Drawing Dwg File

Single Family House Free Cad Blocks Dwg Files


