Flat Roof Dog House Building Plans: A Comprehensive Guide
A dog house provides essential shelter for canine companions, protecting them from the elements. A flat roof dog house offers a contemporary aesthetic and potential added functionality. This article delves into the aspects of selecting and utilizing flat roof dog house building plans, providing technical information to aid in constructing a durable and comfortable shelter for a dog.
Building a dog house, especially one with a flat roof, requires careful planning, material selection, and adherence to safety guidelines. The structural integrity of the roof is paramount, as it must withstand weather conditions such as rain, snow, and wind. Furthermore, the dimensions of the dog house must be appropriate for the size of the dog to ensure its comfort and well-being.
Key Considerations Before Building
Before embarking on the construction process, several factors must be taken into account. These include the size of the dog, the climate, material choices, and local building codes. Failing to address these aspects properly can result in a dog house that is unsuitable or even unsafe for the animal.
The dimensions of the dog house should be determined by the size of the dog. The interior should be large enough for the dog to stand up, turn around, and lie down comfortably. A dog house that is too large, however, may not provide adequate warmth in colder climates. A general guideline is to add approximately 6-12 inches to the dog’s height, length, and width to determine the interior dimensions. Plans for flat roof dog houses often offer guidelines based on standard dog sizes such as small, medium, large, and extra-large breeds.
Climate plays a significant role in material selection and design. In colder climates, insulation is crucial to maintain a comfortable internal temperature. This can be achieved using materials such as rigid foam insulation or fiberglass batting. In warmer climates, ventilation is important to prevent overheating. This can be accomplished with strategically placed vents or an overhang on the roof to provide shade. Consider adding a small opening at the back or sides of the structure for airflow. When using insulated materials, ensure they are properly sealed within the walls to prevent moisture buildup and potential mold growth.
Material choices can significantly impact the durability and longevity of the dog house. Pressure-treated lumber is a common choice for the frame due to its resistance to rot and insect infestation. Exterior-grade plywood or cedar siding can be used for the walls and roof. Cedar is naturally weather-resistant and aesthetically pleasing, but it is more expensive than plywood. The roof covering should be waterproof and durable, such as rolled roofing, EPDM rubber, or PVC membrane. Consider the aesthetic appeal of the materials and how they will blend with the surrounding environment.
Local building codes may regulate the construction of outdoor structures, including dog houses. It is essential to check with local authorities to ensure compliance with all applicable regulations. This may include requirements for setbacks, height restrictions, and building permits. Failure to comply with building codes can result in fines or the requirement to dismantle the structure. Some homeowner associations may also have specific rules regarding the appearance and placement of outdoor structures.
Selecting Flat Roof Dog House Building Plans
Numerous flat roof dog house building plans are available online and in home improvement stores. Selecting the right plan involves careful consideration of the dog's size, the builder's skill level, and the desired aesthetic. It is critical to review the plans thoroughly before starting construction to ensure they are complete, accurate, and easy to follow.
Free plans can be found online, but they may lack the detail and accuracy of paid plans. Paid plans often include detailed diagrams, step-by-step instructions, and a comprehensive materials list. They may also offer variations on the design to accommodate different sizes and preferences. When evaluating free plans, carefully assess their completeness and accuracy before relying on them.
Consider the builder's skill level when selecting plans. Some plans are designed for beginners with minimal woodworking experience, while others are more complex and require advanced skills. Choose a plan that is within the builder's capabilities to avoid frustration and potential errors. If the builder is a novice, consider starting with a simpler design and gradually progressing to more complex projects as their skills improve. This can involve using precut materials or kits to simplify the construction process.
The aesthetic appeal of the dog house should also be considered. A flat roof dog house offers a modern and minimalist look that can complement contemporary architecture. Plans may offer different variations on the design, such as different siding materials, window placements, and roof overhangs. Consider how the dog house will blend with the surrounding environment and choose a design that is visually appealing.
Before purchasing or downloading any plans, read reviews and testimonials from other builders who have used the plan. This can provide valuable insights into the plan's accuracy, completeness, and ease of use. Look for reviews that mention any potential challenges or pitfalls associated with the plan and how to overcome them. Also, look for plans that offer customer support or a forum where builders can ask questions and share their experiences.
Construction Techniques for a Flat Roof Dog House
Constructing a flat roof dog house involves several key techniques that are crucial for ensuring the structural integrity and weather resistance of the structure. These techniques include framing, sheathing, roofing, and waterproofing.
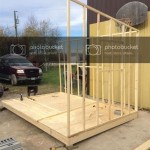
Framing forms the structural skeleton of the dog house. Use pressure-treated lumber for the base frame to protect against ground moisture. Construct the wall frames using 2x4 lumber, ensuring they are square and plumb. Secure the wall frames to the base frame using screws or nails. The roof frame should be constructed with a slight slope (approximately 1/4 inch per foot) to allow for water runoff. This can be achieved by using slightly taller studs on one side of the dog house. Ensure all joints are securely fastened and reinforced with metal connectors if necessary.
Sheathing provides a solid surface for the roofing material. Use exterior-grade plywood to sheath the walls and roof. Cut the plywood to size and attach it to the frame using screws or nails. Ensure the sheathing is properly aligned and flush with the frame. Stagger the seams between the plywood sheets to increase the structural integrity of the sheathing. Seal the seams with construction adhesive or flashing tape to prevent water infiltration.
Roofing is essential for protecting the dog house from the elements. Rolled roofing is a common and cost-effective choice for flat roofs. Apply the rolled roofing according to the manufacturer's instructions, ensuring it is properly sealed and overlapped. EPDM rubber is a more durable and long-lasting option, but it is also more expensive. Apply the EPDM rubber using adhesive and seal the seams with a special seam tape. PVC membrane is another durable option that is resistant to UV damage and chemicals. Apply the PVC membrane using heat welding or adhesive. Ensure the roofing material extends slightly over the edges of the roof to prevent water from running down the walls.
Waterproofing is crucial for preventing water damage to the dog house. Seal all joints and seams with caulk or flashing tape. Apply a waterproof sealant to the base of the dog house to protect it from ground moisture. Consider adding a layer of waterproof membrane between the frame and the sheathing to further enhance waterproofing. Regularly inspect the roof and walls for any signs of leaks or damage and repair them promptly. A well-waterproofed dog house will last longer and provide a more comfortable environment for the dog.
In addition to these techniques, consider adding a drip edge along the edges of the roof to direct water away from the walls. This will help prevent water stains and rot. Also, consider adding ventilation to the roof to prevent moisture buildup and extend the lifespan of the roofing material.
By following these construction techniques, a durable, weather-resistant, and aesthetically pleasing flat roof dog house can be created, providing a comfortable and safe haven for the dog. Remember to prioritize safety, use proper tools, and take the time to do the job right.

How To Build A Dog House

Large Dog House Plans Howtospecialist How To Build Step By Diy

Large Dog House Plans Free Construct101

How To Build A Dog House Diy Plans

Building A Pig House Dog Plans Build With Porch

How To Build A Simple Dog House Diy Instructions

How To Build A Simple Dog House Diy Instructions

Diy Dog House Designs To Keep Your Protected

How To Build A Custom Insulated Dog House Ron Hazelton
:strip_icc()/Beautiful-Pallet-Dog-House-with-Veranda-1-5a202f90494ec90037893a82.jpg?strip=all)
14 Free Diy Dog House Plans Anyone Can Build

