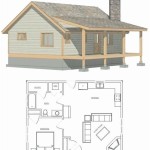
How To Build A Floor Plan In Excel
Microsoft Excel, primarily known for spreadsheet management and data analysis, can also be utilized to create basic floor plans. While not specifically designed for architectural drawing like CAD software, Excel offers a readily available and cost-effective solution for preliminary design and space planning. This article outlines the process of constructing a floor plan within Excel, detailing the necessary steps and considerations.
The primary advantage of using Excel for floor plan creation stems from its grid-based structure, which lends itself well to representing spatial arrangements. Each cell can represent a specific unit of measurement (e.g., a square foot or a square meter), allowing for a scaled representation of a room or building. This method is particularly useful for quick conceptualization, initial layout design, and basic space allocation before transitioning to more sophisticated software.
Before commencing the design process, it is crucial to define the scale. The chosen scale will dictate how many cells represent a defined unit of measurement. For instance, one cell could represent one square foot, or one cell could represent six inches. The scale should be determined based on the project's size and the required precision. Consider the largest dimension of the planned space and choose a scale that allows the entire floor plan to fit within the Excel worksheet without compromising usability.
Setting Up the Excel Worksheet
The first step involves preparing the Excel worksheet for floor plan creation. This primarily involves adjusting cell dimensions to create a visual grid that accurately reflects the established scale. The default rectangular cells are not ideal for floor plan representation; therefore, they need to be adjusted to form squares. This is accomplished by modifying the row height and column width.
To create square cells, select the entire worksheet by clicking the triangle in the top-left corner where the row and column headers intersect. Next, right-click on any column header (e.g., "A," "B," "C") and select "Column Width." A dialog box will appear, allowing you to enter a specific value for the column width. Enter a value that, when visually compared to the row height, creates a square. This value often requires some experimentation to achieve the desired result. Values between 2 and 4 are common starting points, but the optimal value depends on the default font and its size.
Similarly, right-click on any row number (e.g., "1," "2," "3") and select "Row Height." Enter a numerical value, this time observing the appearance of the rows relative to the columns that have already been resized. The objective is to visually approximate a square cell; exact numerical precision is less critical than the perceived visual accuracy of the cell geometry. Once the row height and column width are adjusted to approximate squares, the worksheet is ready for floor plan construction.
Consider adding gridlines to improve visibility. By default, Excel displays gridlines, but if they are hidden, navigate to the "View" tab and ensure the "Gridlines" box is checked. These gridlines provide a visual framework for drawing the floor plan. Remember that printed gridlines are a separate functionality and can be toggled on or off within the "Page Layout" tab under the "Print Titles" option and then within "Sheet Options."
Drawing Walls and Structures
With the grid established, the next step is to represent walls and other structural elements. This is achieved by formatting the cells to visually distinguish them as walls or solid objects. The simplest approach involves filling the cells representing walls with a solid color.
Select the range of cells that correspond to the desired wall length and thickness based on the established scale. For example, if each cell represents one foot and the wall is one foot thick, select a single row or column of cells to represent the wall's width. The length of the wall is determined by selecting the corresponding number of cells along the row or column.
Once the cells representing the wall are selected, navigate to the "Home" tab and locate the "Fill Color" option in the "Font" group. Choose a suitable color, such as black or gray, to represent the wall. Clicking the fill color option will immediately apply the selected color to the selected cells, visually rendering the wall outline. Repeat this process to draw all walls and structural elements of the floor plan. Consider different colors to represent different wall types (e.g., load-bearing walls versus partition walls).
To represent doorways or windows, leave gaps in the wall outlines. The width of the gap should correspond to the actual width of the doorway or window based on the chosen scale. Alternatively, use different fill colors or cell borders to indicate these openings. The borders can be modified using the "Borders" option in the "Font" group on the "Home" tab. Different line styles and colors can be applied to the cell borders to visually distinguish them from standard walls.
Interior features such as cabinets, furniture, and appliances can be represented similarly. Choose a distinct fill color or use cell borders to differentiate these elements from walls. Use shapes from the "Insert" tab under "Illustrations" and then "Shapes" to draw more complex objects and then place those shapes on top of the grid in appropriate locations. The shapes can be resized and reshaped to match the dimensions of the desired objects.
Adding Details and Annotations
While Excel floor plans are primarily visual representations, adding dimensions and annotations can significantly enhance their usefulness. This involves inserting text boxes or using cell values to display measurements and labels.
To add dimensions, use the "Insert" tab and select "Text Box." Draw a text box near the section of the floor plan that requires a dimension. Then, manually enter the dimension value based on the number of cells representing the length being measured, taking into account the defined scale. For instance, if a wall spans 10 cells and each cell represents one foot, enter "10 ft" in the text box. Adjust the text box's size and position to align it with the corresponding wall segment.
Alternatively, cell values can be used to display dimensions. In an adjacent cell, enter a formula that calculates the distance between two points on the floor plan based on cell coordinates. For example, if the wall starts in cell B2 and ends in cell B12, the formula could be "=B12-B2". The resulting value represents the number of cells spanned by the wall. This method requires careful tracking of cell coordinates and may be more suitable for smaller, simpler floor plans.
Annotations, such as room names or material specifications, can also be added using text boxes or cell values. Label each room by inserting a text box within the room's boundaries and entering the name, e.g., "Living Room" or "Bedroom." Similarly, material specifications can be added to walls or other elements using text boxes or cell values placed near the corresponding feature.
Consider using Excel's conditional formatting features to highlight specific areas or elements of the floor plan. Conditional formatting allows you to automatically apply formatting rules based on cell values or other criteria. For instance, you can highlight all cells representing a specific type of flooring with a particular color or pattern. This feature can be accessed from the "Home" tab under "Conditional Formatting" in the "Styles" group.
To maintain clarity and organization, consider using different worksheets within the Excel workbook to represent different floors or sections of the building. This allows you to manage larger and more complex floor plans without overwhelming a single worksheet. Each worksheet can be customized with its own scale, color scheme, and annotations.
While Excel offers a basic platform for floor plan creation, its limitations should be acknowledged. Excel lacks the precision and advanced features of dedicated CAD software. However, for preliminary design, space planning, and quick visualization, Excel provides a readily accessible and user-friendly alternative. By carefully setting up the worksheet, drawing walls and structures, and adding details and annotations, a functional floor plan can be constructed within Excel.

3 Ways To Draw And Create A Floorplan In Excel Like Cad With Examples

How To Make A Floorplan In Excel Microsoft Tips

How To Create House Plans Elevations In Microsoft Excel Using Verbal Scale

Create Floor Plan Using Ms Excel 5 Steps With Pictures Instructables

3 Ways To Draw And Create A Floorplan In Excel Like Cad With Examples

Create Floor Plan Using Ms Excel 5 Steps With Pictures Instructables

How To Draw And Create A Floor Plan In Excel Like Cad Part 2 Live Examples With Addin Link

How To Make A Floorplan In Excel Microsoft Tips

Create Floor Plan Using Ms Excel 5 Steps With Pictures Instructables

Easy Home Building Floor Plan Cad Pro

