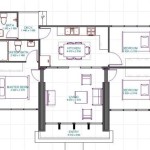
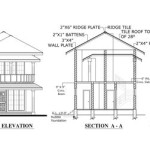
Create a New Floor Plan in Revit 2017: A Comprehensive Guide
Creating a floor plan in Revit 2017 empowers architects, engineers, and designers to develop precise and detailed building plans. This guide covers the essential steps involved in creating a new floor plan, ensuring a seamless and efficient design process.
1. Start a New Project
Launch Revit 2017 and choose the 'New' option to start a new project. Select the appropriate template or create a custom template based on your project requirements.
2. Set Project Location and Units
Navigate to the 'Project' tab and expand the 'Location' panel. Specify the location of your project and set the appropriate units (e.g., feet-inches or meters) to ensure accurate measurements.
3. Create Architectural Elements
To create walls, click the 'Wall' tool on the 'Architecture' tab. Draw the walls by clicking and dragging the cursor. To create doors and windows, select the 'Component' tool and choose the desired element from the 'Door' or 'Window' category.
4. Define Floors and Levels
Navigate to the 'Structure' tab and click the 'Floor' tool. Create a new floor plan by selecting the 'New Floor' option. Define the floor height and thickness.
5. Arrange and Dimension Elements
Use the 'Move' and 'Rotate' tools to arrange the architectural elements in the desired layout. Add dimensions to the floor plan using the 'Dimension' tool. This will provide accurate measurements for construction purposes.
6. Add Annotations and Details
Annotate the floor plan with labels, notes, and schedules. Use the 'Text' tool to add labels, and the 'Detail Item' tool to create detailed sections or callouts.
7. Check for Errors and Markups
Run a 'Check for Errors' command to identify any inconsistencies or conflicts in the floor plan. Use the 'Markup' tools to highlight areas that require attention or revisions.
8. Save and Share the Floor Plan
Save the floor plan as a Revit (.rvt) file. Use the 'Publish' option to share the plan in various formats, such as PDF, DWG, or IFC.
Tips for Creating Efficient Floor Plans
*Use layers to organize the floor plan into different categories (e.g., walls, doors, annotations).
*Create custom component families to save time and ensure consistency throughout the project.
*Utilize the 'Align' and 'Distribute' tools for precise placement of elements.
*Consider using the 'Rooms' feature to automatically create room spaces and calculate areas.
*Collaborate with team members using Revit's BIM capabilities for real-time updates and coordination.
22 7 Revit 2024 Tutorial For Beginners Floor Plan And Architecture 3d Modeling
22 2 Revit 2024 Tutorial For Beginners Floor Plan And Architecture 3d Modeling
1 Autodesk Revit 2024 Floor Plan How To Create Semidetached Duplex
14 Beginner Tips To Create A Floor Plan In Revit Pure
14 Beginner Tips To Create A Floor Plan In Revit Pure
2 Ways To Add Levels In Revit Mashyo
11 Revit 2024 Complete Tutorial For Beginners Add Or Modify Level Story
How To Create Custom Sheets In Autodesk Revit 2024
11 Tips To Create Site Plans In Revit Mashyo
Autodesk Revit User Interface Tutorial Introduction Residential Design Using 2024