How to Create Your Own House Plans
Building a new home is a significant undertaking that involves careful planning and consideration of various factors. While hiring an architect or professional designer is a common approach, many individuals choose to create their own house plans. This allows for greater customization, control over the design process, and potentially cost savings. This article will guide you through the steps involved in creating your own house plans, offering valuable insights and practical tips.
1. Define Your Needs and Goals
The first step in creating house plans is to define your needs and goals for the project. Consider the following:
- Number of bedrooms and bathrooms: Determine how many bedrooms, bathrooms, and other living spaces you require based on your family size, lifestyle, and future needs.
- Desired living style: Do you prefer an open floor plan, a traditional layout, or something else? Consider the flow of traffic, privacy needs, and entertainment space.
- Specific features: Identify any specific features you would like to incorporate, such as a fireplace, a home office, a large kitchen island, or a laundry room.
- Budget: Establish a realistic budget for construction and materials. This will help you make informed decisions during the design process.
- Location and site: Consider the size and shape of your lot, surrounding structures, and any zoning regulations.
By carefully considering these factors, you can create a clear vision for your future home and ensure that your plans meet your specific requirements.
2. Gather Inspiration and Research
Once you have a general idea of your needs, it's time to gather inspiration and research different design styles and architectural elements. Look at magazines, websites, and online design platforms for examples of homes that appeal to you. Study the floor plans, elevations, and interior design details of these homes to understand how they function and what features you like or dislike.
Additionally, research local building codes, regulations, and zoning requirements. Understanding these regulations is essential for ensuring your design complies with legal standards and meets the specific requirements of your location.
3. Develop a Preliminary Floor Plan
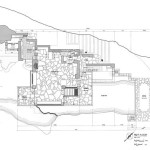
With your inspiration and research in mind, start developing a preliminary floor plan. This will be a rough sketch of your home's layout, showing the placement of rooms, walls, doors, and windows. Use graph paper, software, or even a simple pen and paper to create your plan. This can be a more free-flowing process, as you can experiment with different layouts and try out different ideas.
Consider the following when developing your floor plan:
- Traffic flow: Ensure that the layout allows for easy movement between rooms and prevents bottlenecks.
- Privacy: Designate private areas for bedrooms and bathrooms, and balance privacy with accessibility to common spaces.
- Functionality: Make sure rooms are appropriately sized and designed for their intended use, and consider storage needs.
- Natural light: Optimize window placement to maximize natural light and create a bright and airy interior.
Remember that this is a preliminary plan, and you can adjust it as you progress through the design process.
4. Create Detailed Drawings
Once you have a satisfactory preliminary floor plan, it's time to create detailed drawings. This will involve developing accurate scale plans that show the precise dimensions of each room, wall, door, window, and other features. You can use drafting software, such as AutoCAD, Revit, or SketchUp, or create them by hand with a ruler, compass, and other drafting tools.
Consider these additional drawings:
- Elevation drawings: These show the exterior of your home from different angles, including the roofline, windows, doors, and siding.
- Section drawings: These display a cross-section of your home, revealing the layout and connections between different levels.
- Detail drawings: These provide detailed views of specific features, such as staircases, fireplaces, or custom cabinetry.
Accurate and detailed drawings will be essential for contractors to understand your vision and build your home correctly.
5. Seek Feedback and Revisions
Before you finalize your house plans, seek feedback from family members, friends, and professionals. Show your drawings to a contractor or a building inspector to ensure they meet local building codes and are feasible for construction. Incorporate their suggestions and make necessary revisions to your plans until you are satisfied with the design.
6. Obtain Permits and Approvals
Once your house plans are finalized, you'll need to obtain the necessary permits and approvals from your local building department. This process may vary depending on your location and the specifics of your project. Ensure that you submit complete and accurate plans, and be prepared to answer any questions from building officials.
7. Prepare Construction Drawings
Once the plans are approved, you may need to prepare construction drawings. These are detailed drawings specifically for the contractors, providing precise measurements, specifications, and materials for every element of your home. This step may involve working with a professional draftsperson or architect to ensure the construction drawings are complete and accurate.
Creating your own house plans can be a rewarding and fulfilling experience. By following these steps and dedicating time and effort to the process, you can design a home that meets your personal needs and reflects your individual style.

Floor Plan Creator And Designer Free Easy App

House Plans How To Design Your Home Plan

House Plans How To Design Your Home Plan

House Plans How To Design Your Home Plan

Create Floor Plan Architecture Sink

House Plans How To Design Your Home Plan

House Plans How To Design Your Home Plan

House Plans How To Design Your Home Plan

Floor Plan Creator And Designer Free Easy App

House Plans How To Design Your Home Plan
Related Posts