How to Draw a Floorplan in AutoCAD 2018: A Step-by-Step Guide
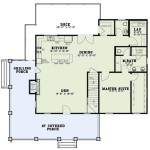
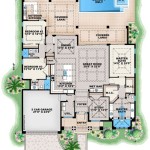
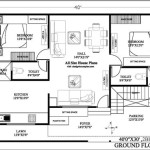
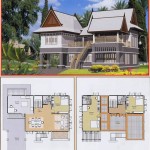
Creating a floorplan in AutoCAD 2018 is a fundamental skill for architects, interior designers, and home renovators. A floorplan provides a detailed representation of a building's layout, including the arrangement of rooms, doors, windows, and other features. By following a step-by-step approach, you can easily create accurate and professional-looking floorplans using AutoCAD 2018. ### 1. Set Up Your Drawing - Launch AutoCAD 2018 and start a new drawing by clicking the "New" button or using the keyboard shortcut "Ctrl+N." - Set the appropriate units for your project. For architectural drawings, using feet and inches is common. To set the units, click the "Units" drop-down menu in the lower-left corner of the drawing area and select the desired unit system. ### 2. Create Walls - Begin by drawing the exterior walls of the building. Use the "Line" command (keyboard shortcut: "L") to create straight walls. Click to set the starting point of the wall, move the cursor to specify the direction and length, and click again to finalize the line. - To create walls at right angles, use the "Orthogonal" mode (keyboard shortcut: "Ortho"). This mode restricts line segments to horizontal or vertical directions, making it easier to draw perpendicular walls. - Continue drawing the exterior walls until the building's perimeter is complete. ### 3. Add Interior Walls - After drawing the exterior walls, start adding interior walls to divide the building into rooms. Follow the same process as for the exterior walls, using the "Line" command and "Orthogonal" mode. - When drawing interior walls that connect to exterior walls, make sure to extend them slightly beyond the intersection point. This will create a small gap, preventing AutoCAD from automatically merging the lines. ### 4. Insert Doors and Windows - To insert doors and windows, use the "Insert" tab in the ribbon. In the "Blocks" panel, click the "Door" or "Window" button. - Select a door or window block from the provided library or import a custom block from a file. - Click a location on the floorplan to insert the door or window. Use the "+" and "-" buttons in the "Properties" panel to adjust the size of the door or window. - Continue inserting doors and windows as needed, ensuring their placement aligns with the walls. ### 5. Add Room Labels - To label the rooms, use the "Text" command (keyboard shortcut: "TEXT"). Click a location within the room and type the room name. - Use the "Properties" panel to adjust the text font, size, and alignment. You can also create a text style in the "Text Style" dialog box for consistent room labeling throughout the drawing. ### 6. Add Dimensions - Dimensions are essential for accurately conveying the size and scale of the floorplan. Use the "Dimension" command (keyboard shortcut: "DIM") to add linear, angular, or radial dimensions. - Click the starting point and endpoint of the dimension line, and then specify the type of dimension (e.g., linear, angular, radial). You can customize the dimension style in the "Dimension Style" dialog box. ### 7. Add Furniture and Fixtures - To add furniture and fixtures, use the "Insert" tab in the ribbon. In the "Blocks" panel, click the "Furniture" or "Fixtures" button. - Select furniture and fixture blocks from the provided library or import custom blocks from a file. - Click a location on the floorplan to insert the furniture or fixture. Use the "+" and "-" buttons in the "Properties" panel to adjust the size and rotation of the object. ### 8. Save and Export the Floorplan - Once you have completed the floorplan, save it by clicking the "Save" button or using the keyboard shortcut "Ctrl+S." Choose a suitable file name and location. - To export the floorplan, click the "Export" button in the "File" tab. In the "Export" dialog box, select a file format (e.g., DWG, DXF, PDF) and specify the output options. ### Conclusion By following these steps, you can create detailed and accurate floorplans in AutoCAD 2018. Practice is key to mastering the software and producing professional-looking drawings. Experiment with different features and techniques to enhance your floorplan design skills.
Autocad 2024 Tutorial Making A Simple Floor Plan In 2d Drawing

Basic Floor Plan Drafting In Autocad 7 Steps Instructables

How To Draw Floor Plans In Autocad Edrawmax

Making A Simple Floor Plan In Autocad Part 1 Of 3

How To Draw Autocad Floor Plan Cad Cam Blog

Autocad 2024 Basic 2d Floor Plan For Beginner Complete

Autocad 2024 Basic 2d Floor Plan For Beginner Complete

Autocad 2024 Help File Tab Menu Autodesk

How To Make House Floor Plan In Autocad Fantasticeng

Autocad Lt 2024 Help Plot A Drawing Layout Autodesk