How To Draw Floor Plan In Google SketchUp
Google SketchUp is a free 3D modeling software that can be used to create a variety of models, including floor plans. Floor plans are two-dimensional representations of the layout of a building, and they can be used for a variety of purposes, such as planning renovations, designing new buildings, or creating virtual tours.
If you're new to SketchUp, don't worry - it's a relatively easy program to learn. In this article, we'll walk you through the steps of how to draw a floor plan in SketchUp and provide some resource links. So let's get started!
Step 1: Create a new file
The first step is to create a new file in SketchUp. To do this, click on the "File" menu and then select "New." A new window will open up where you can specify the dimensions of your floor plan. For now, just click on the "OK" button to create a new file with the default settings.
Step 2: Draw the walls
The next step is to draw the walls of your floor plan. To do this, click on the "Line" tool in the toolbar. Then, click on the starting point of your wall and drag your mouse to the endpoint. Repeat this process for all of the walls in your floor plan.
Step 3: Add doors and windows
Once you have drawn the walls, you can start adding doors and windows. To do this, click on the "Insert" menu and then select "Component." A window will open up where you can browse through the available components. Select the door or window that you want to add to your floor plan and then click on the "Insert" button.
Step 4: Add furniture and other objects
Now you can start adding furniture and other objects to your floor plan. To do this, click on the "Insert" menu and then select "Component." A window will open up where you can browse through the available components. Select the object that you want to add to your floor plan and then click on the "Insert" button.
Step 5: Save your file
Once you have finished drawing your floor plan, be sure to save your file. To do this, click on the "File" menu and then select "Save." A window will open up where you can specify the location and name of your file. Click on the "Save" button to save your file.
Tips and Resources
Here are a few tips and resources that can help you draw floor plans in SketchUp:
- Use the "Tape Measure" tool to measure the dimensions of your walls, doors, and windows.
- Use the "Rotate" tool to rotate objects in your floor plan.
- Use the "Scale" tool to scale objects in your floor plan.
- Use the "Layers" panel to organize the different elements of your floor plan.
- SketchUp video tutorials
- SketchUp documentation
- SketchUp community forum
With a little practice, you'll be able to draw floor plans in SketchUp like a pro! So what are you waiting for? Get started today.

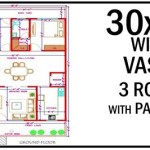
Sketchup Floor Plan Tutorial For Beginners

Sketch Floor Plan To 3d In Sketchup

Plan View 2d Sketchup For Web Community

How To Start A Architectural Floorplan In Google Sketchup

Plan View 2d Sketchup For Web Community

Sketchup Tutorial How To Create A Quick Floor Plan

How To Draw Floor Plans In Sketchup Edrawmax

Sketchup 101 Architecturecourses Org

How To Create A Floor Plan With Sketchup Easy Steps

Expert Tips On How To Create A Professional Floor Plan Sketchup Hub