How To Draw Floor Plans For A House
Creating a floor plan for a house is a fundamental step in architectural design and home renovation. A well-drawn floor plan provides a visual representation of the layout, allowing architects, builders, and homeowners to understand the spatial relationships between rooms and elements within a dwelling. This article will detail the process of creating accurate and informative floor plans, covering essential tools, techniques, and considerations.
Before beginning the drawing process, it is crucial to define the scope and purpose of the floor plan. Is it for a new construction project, a renovation, or simply to visualize the existing space? The level of detail required will vary accordingly. A new construction plan demands comprehensive information including wall thicknesses, window and door placements, and plumbing and electrical layouts. A renovation plan may focus on specific areas being modified, while a plan for visualization may prioritize overall dimensions and room arrangements.
Gathering accurate measurements is paramount. For existing structures, use a laser measuring device or a traditional measuring tape. Laser measures offer greater speed and accuracy, especially for larger spaces. Measure each wall, doorway, window opening, and any permanent fixtures or obstructions. Record these measurements meticulously, creating a rough sketch of the space as a reference. Ensure that all measurements are taken in the same units (e.g., inches, feet, or meters) to maintain consistency throughout the drawing process. For new constructions, refer to architectural blueprints or approved site plans for dimensions.
Choosing the right tools is essential. The traditional method involves using graph paper, pencils, erasers, a triangle, and a ruler. This method provides hands-on control and allows for greater detail. Computer-Aided Design (CAD) software such as AutoCAD, Revit, or SketchUp offers a digital alternative. CAD software provides greater precision, scalability, and the ability to create 3D models. Several free or low-cost online floor plan tools are also available, which may suffice for simple projects.
Key Point 1: Fundamental Elements of a Floor Plan
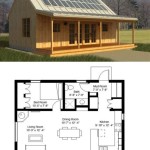
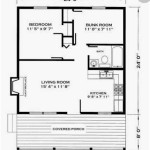
A floor plan is more than just lines on paper. It's a standardized representation of a space, and certain elements must be included for clarity and usability. These elements include walls, doors, windows, fixtures, and annotations.
Walls are the primary structural elements of a floor plan. Lines representing walls should be drawn to scale, indicating their thickness. Different line weights can be used to distinguish between exterior and interior walls. For example, thicker lines could represent exterior walls, while thinner lines indicate interior partitions. The exact wall thickness will vary based on construction type and local building codes.
Doors are represented by an arc showing the swing direction and a line representing the door itself. The swing direction indicates which way the door opens and is crucial for understanding the flow of traffic within the space. The dimension of the door opening should also be noted. Standard door widths are typically 30, 32, or 36 inches, but this may vary depending on the room or purpose.
Windows are typically depicted as two or three parallel lines within the wall, indicating the window frame and glass. The size and placement of windows are critical to understanding natural light and ventilation in the space. Include the window width and height in the plan annotation.
Fixtures refer to items such as sinks, toilets, bathtubs, showers, kitchen appliances (refrigerators, stoves, dishwashers), and built-in cabinets. These fixtures are represented with standardized symbols to ensure consistency and clarity. For example, a toilet is typically represented by a circular or oval shape, while a sink is depicted by a rectangular or oval shape with a faucet symbol.
Annotations provide essential information about the floor plan. This includes room names, dimensions, and notes about specific features. Dimensions should be clearly labeled, indicating the length and width of each room or space. Room names help orient the viewer and understand the purpose of each area. Notes can be used to clarify specific details, such as the location of electrical outlets, plumbing access points, or other pertinent information. Use a consistent font and size for all annotations to maintain readability.
Key Point 2: Drawing Techniques and Considerations
Several techniques and considerations influence the accuracy and clarity of a floor plan. Scale selection, line weights, and adherence to architectural conventions are crucial for creating professional-looking plans.
Choosing an appropriate scale is essential for accurately representing the space. Common scales for floor plans include 1/4 inch = 1 foot or 1/8 inch = 1 foot. The scale selection depends on the size of the building and the level of detail required. A larger scale (e.g., 1/4 inch = 1 foot) allows for greater detail, while a smaller scale (e.g., 1/8 inch = 1 foot) is suitable for larger structures.
Line weights are used to differentiate between different elements in the floor plan. Thicker lines are typically used for walls, while thinner lines are used for windows, doors, and fixtures. Varying line weights help to create visual hierarchy and make the plan easier to read. Consistent application of line weights across the entire plan maintains a professional appearance.
Adhering to architectural conventions ensures that the floor plan is easily understood by architects, builders, and other professionals. Standardized symbols are used for doors, windows, fixtures, and other elements. These symbols are widely recognized and help to avoid confusion. Architectural conventions also dictate how dimensions and annotations are presented. Consistent application of these conventions is crucial for creating a clear and informative floor plan.
Consider accessibility requirements when designing a floor plan. Ensure that doorways are wide enough to accommodate wheelchairs or other mobility devices. Provide adequate space for maneuvering in hallways and bathrooms. Incorporate ramps or elevators to provide access to different levels of the building. Compliance with accessibility standards is essential for creating inclusive and usable spaces.
Plan for circulation and flow. Think about how people will move through the space and arrange rooms and doorways accordingly. Avoid creating bottlenecks or congested areas. Ensure that there is a clear and logical flow between different rooms. Consider the placement of furniture and fixtures to optimize the usability of each space.
Key Point 3: Using Software for Floor Plan Creation
While manual drafting remains a viable option, numerous software applications simplify and enhance the floor plan creation process. CAD software, online floor plan tools, and BIM software offer various features and capabilities.
CAD software such as AutoCAD, Revit, and ArchiCAD provides powerful tools for creating precise and detailed floor plans. CAD software allows for accurate scaling, layering, and dimensioning. It also offers the ability to create 3D models from 2D floor plans. While CAD software can have a steep learning curve, its capabilities and flexibility make it a valuable tool for professional architects and designers.
Online floor plan tools offer a simplified approach to creating floor plans. These tools are typically web-based and offer a user-friendly interface. They often include pre-designed templates and libraries of furniture and fixtures. Online floor plan tools are suitable for simple projects or for creating preliminary designs. Examples include RoomSketcher, Planner 5D, and SmartDraw. These tools often have free and paid versions, with paid versions offering additional features and capabilities.
Building Information Modeling (BIM) software such as Revit is an advanced tool for creating comprehensive building models. BIM software integrates architectural, structural, and mechanical systems into a single model. This allows for better coordination between different disciplines and helps to identify potential conflicts early in the design process. BIM software is typically used for large-scale projects and requires specialized training.
When choosing software for floor plan creation, consider the complexity of the project, the required level of detail, and budget constraints. CAD software is suitable for complex projects requiring high precision and flexibility. Online floor plan tools are ideal for simple projects or for creating preliminary designs. BIM software is used for large-scale projects requiring comprehensive building models.
Regardless of the chosen method, continuously review and refine the floor plan to ensure accuracy and functionality. Seek feedback from others to identify potential issues or areas for improvement. A well-designed floor plan is a valuable tool for communicating design ideas and achieving the desired outcome.
After creating the initial floor plan, review it thoroughly. Check for errors in measurements, dimensions, and placement of fixtures. Ensure that the plan meets all applicable building codes and regulations. Revise the plan as needed to address any issues or concerns. Consider the placement of electrical outlets, lighting fixtures, and HVAC systems. A comprehensive floor plan should include all essential building systems.
Consider future needs when designing a floor plan. Think about how the space may be used in the future and plan accordingly. Provide flexibility for future renovations or additions. Design the space to be adaptable to changing needs and lifestyles. A well-designed floor plan should be functional and adaptable for years to come.

Floor Plans Learn How To Design And Plan

How To Draw A Floor Plan Live Home 3d

Make Your Own Blueprint How To Draw Floor Plans

Home Floor Plans House Plan Drawings

House Plans How To Design Your Home Plan

Easy Home Building Floor Plan Cad Pro

Floor Plans How To Design The Perfect Layout Cherished Bliss

Floor Plan Creator And Designer Free Easy App

How To Draw House Plans Floor

How To Draw A Floor Plan As Beginner Edrawmax


