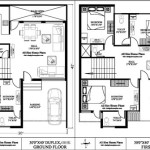
How to Draw Floor Plans for Beginners: A Comprehensive Guide
Creating accurate and informative floor plans is an essential skill for architects, designers, and homeowners alike. Whether you're embarking on a renovation project or simply want to visualize your living space, knowing how to draw floor plans will empower you to plan and organize your spaces effectively.
1. Gather Measurement Tools and Materials
Before you begin drawing, gather the necessary tools and materials. These include:
- Measuring tape or laser distance measurer
- Graph paper or a scale ruler
- Pencil, eraser, and sharpener
- Protractor or angle finder
2. Measure and Document the Space
Thoroughly measure the entire space, including walls, windows, doors, and any other fixed elements. Record your measurements in a notebook or spreadsheet for easy reference.
3. Choose a Scale
Determine the appropriate scale for your floor plan based on the size of the space. Common scales for residential floor plans include 1/4" = 1', 1/8" = 1', and 1/16" = 1'.
4. Draw the Outline of the Space
On graph paper or using a scale ruler, draw the outline of the floor plan. Start by drawing the perimeter walls, then add interior walls and any alcoves or recesses.
5. Mark Windows and Doors
Indicate the locations and sizes of windows and doors on your floor plan. Use squares, rectangles, or circles to represent these elements. Indicate the direction of door swings as well.
6. Add Fixed Elements
Draw in all fixed elements within the space, such as fireplaces, closets, built-in cabinetry, and stairs. Use appropriate symbols or shading to differentiate these elements from the rest of the floor plan.
7. Draw in Furniture and Appliances
For a complete floor plan, include the layout of furniture and appliances. Use symbols or outlines to represent different types of furniture, such as sofas, beds, tables, and chairs. Indicate the placement of appliances like refrigerators, ovens, and dishwashers.
8. Label the Plan
Clearly label all rooms, doors, windows, and other key elements on the floor plan. This will make it easy to reference and understand the layout.
9. Add Notes and Details
Use notes and details to provide additional information about the floor plan, such as ceiling heights, floor finishes, or any specific design considerations.
10. Check and Revise
Once you've completed your floor plan, carefully check it for accuracy by comparing it to your measurements and referring to the space itself. Make any necessary revisions and adjustments to ensure the floor plan accurately reflects the layout.
Additional Tips
* Use a light touch when drawing, as you may need to erase and redraw lines. * Draw all lines parallel to the graph paper or scale ruler to ensure accuracy. * Use a protractor to accurately draw angles for walls or furniture. * Double-check your measurements and calculations to avoid errors. * Practice regularly to improve your drawing skills and create more precise floor plans.
How To Draw A Floor Plan Live Home 3d

Draw Floor Plans In Half The Time Cedreo

How To Draw A Floor Plan Live Home 3d

Draw Floor Plans With The Roomsketcher App

How To Draw Floor Plans With Floorplanner Com Young House Love

Draw Floor Plans With The Roomsketcher App

How To Draw A Floor Plan As Beginner Edrawmax

How To Make Floor Plans For Free In Sketchup

Floor Plans Learn How To Design And Plan

Beginners Guide To Drawing A Floor Plan With Free

