How To Draw House Plans In Word
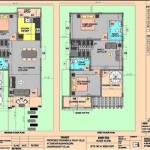
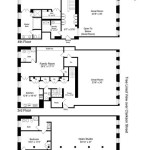
Microsoft Word is a versatile word processing program that can be used for a variety of tasks, including drawing house plans. While it is not as feature-rich as dedicated CAD software, Word can be a good option for creating simple house plans. Here are the essential steps on how to draw house plans in Word:
1. Create a New Document
To start, create a new blank document in Word. Set the page orientation to landscape so that you have more space to work with. You can also adjust the page size to match the size of your house plans.
2. Insert a Grid
A grid can help you to keep your house plans organized and to scale. To insert a grid, go to the View tab and click on the Gridlines button. You can then customize the grid settings, such as the spacing and color.
3. Draw the Exterior Walls
Start by drawing the exterior walls of your house. To do this, use the Line tool (located on the Insert tab) to create a series of lines. You can use the Shift key to constrain the lines to horizontal or vertical.
4. Add Windows and Doors
Once you have drawn the exterior walls, you can add windows and doors. To do this, use the Rectangle tool (located on the Insert tab) to create rectangles for the windows and doors. You can then use the Line tool to add the frames and details.
5. Draw the Interior Walls
If you want to show the interior layout of your house, you can draw the interior walls. To do this, use the Line tool to create a series of lines to represent the walls. You can also use the Rectangle tool to create rectangles for the rooms.
6. Add Furniture and Fixtures
To make your house plans more realistic, you can add furniture and fixtures. To do this, insert images or clip art of furniture. You can also use the Shapes tool (located on the Insert tab) to create your own furniture and fixtures.
7. Label the Rooms
To help you to identify the different rooms in your house plans, you can label them. To do this, use the Text Box tool (located on the Insert tab) to create a text box for each room. You can then type in the name of the room.
8. Save Your House Plans
Once you have finished drawing your house plans, save them so that you can refer to them later. To do this, go to the File tab and click on the Save As button. Choose a location to save your file and then click on the Save button.
Tips for Drawing House Plans in Word
Here are a few tips for drawing house plans in Word:
- Use a ruler or a grid to help you to keep your lines straight and to scale.
- Use different line weights and colors to differentiate between different types of walls, windows, and doors.
- Add labels to your house plans to help you to identify the different rooms and features.
- Save your house plans in a format that is compatible with other software programs, such as PDF or DWG.
By following these steps, you can create simple house plans in Word. While Word is not as feature-rich as dedicated CAD software, it can be a good option for creating basic house plans.

Floor Plan Creator And Designer Free Easy App

Free Floor Plan Designer

Easy Home Building Floor Plan Cad Pro

How To Make A Floorplan In Excel Microsoft Tips

Sample Floorplan Floor Plan Template

Free Floor Plan Creator Edrawmax

How To Draw House Plan Ghar Ka Naksha Kaise Banaye Makan Plans

Popular Apartment Floor Plan Design Cad Pro

How To Draw Floor Plans In Autocad Edrawmax

How To Make A Floorplan In Excel Microsoft Tips


