How to Make a 3D Floor Plan in 3ds Max: A Comprehensive Guide
Creating 3D floor plans is a valuable skill in the field of architecture and interior design. 3ds Max is a versatile software that offers robust capabilities for creating realistic and precise floor plans. This comprehensive guide will walk you through the essential steps involved in making a 3D floor plan in 3ds Max.
1. Import Floor Plan Drawing
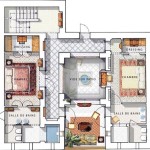
Begin by importing the floor plan drawing into 3ds Max. You can import a 2D AutoCAD DWG or DXF file as a background image. Position and scale the drawing accurately to serve as a reference for the 3D model.
2. Create Walls
Use the "Create" panel to construct the walls of the floor plan. Select "Geometry" > "Box" and draw the shape of the walls. Adjust the height and thickness as needed. Connect the walls using the "Connect" tool to form the perimeter of the room.
3. Add Doors and Windows
From the "Create" panel, select "Openings" to insert doors and windows. Position them by clicking on the wall surface and dragging to the desired size. You can adjust the style and open direction of the openings in their respective properties panels.
4. Define Floor and Ceiling
Create a plane to represent the floor surface. Use the "Create" panel > "Geometry" > "Plane." Adjust the size and position of the plane to cover the entire floor area. Similarly, create a plane for the ceiling by selecting "Create" > "Geometry" > "Plane" and positioning it at the desired height.
5. Model Interior Objects
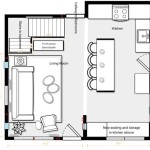
Add furniture, appliances, and other interior objects to furnish the floor plan. Import 3D models or use the "Create" panel to generate basic shapes. Position and scale the objects to fit the proportions of the room.
6. Assign Materials and Textures
Apply materials and textures to the surfaces of the floor plan. Select an object, navigate to the "Material Editor" (M key), and assign a material. You can choose from the pre-defined materials or create your own by importing textures or editing material parameters.
7. Add Lighting and Cameras
Create lighting to illuminate the floor plan. Add light sources from the "Create" panel > "Lights." Position and adjust the lights to create desired lighting conditions. Place a camera to capture the best angle of the floor plan and configure its settings as needed.
8. Render the Floor Plan
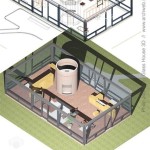
Once the floor plan is complete, render it to generate a photorealistic image. Select "Render" from the main menu and choose the desired rendering engine. Adjust rendering settings such as resolution, anti-aliasing, and lighting. Once you are satisfied with the settings, initiate the rendering process.
Conclusion
Creating 3D floor plans in 3ds Max empowers you to visualize and present design concepts in a realistic and immersive manner. By following these steps, you can create professional-grade floor plans that effectively communicate spatial relationships, interior arrangements, and lighting scenarios. With practice and exploration, you can master the art of 3D floor plan creation and elevate your design presentations.

3ds Max Tutorial 3d Cut Plan And Best Vray Setting

Create 3d Floor Plan Rendering In 3ds Max Architecture Tutorial

3d Cut Floor Plan In Max Vray Part 1

3ds Max Pt 2 Extruding A Floor Plan

3ds Max Basic 3d Floor Plan Modeling Wall Door Windows Tutorial

How To Make 3d Floor Plan 3ds Max Part I

3ds Max 2024 Floor Plan With Aec Extended Tutorial For Beginner Complete

3ds Max Pt 1 Extruding A Floor Plan

3ds Max Basic 3d Floor Plan Modeling Wall Door Windows Tutorial

3d Floor Plan Designing With Photo And 3ds Max Part 04 How To Make Design


