How to Create a Floor Plan in 3ds Max: A Comprehensive Guide
Creating a floor plan in 3ds Max is a fundamental skill for architects, interior designers, and anyone involved in the design and planning of buildings. A floor plan is a technical drawing that provides a detailed representation of a building's layout, including the arrangement of rooms, walls, and other structural elements. In this guide, we will delve into the essential aspects of creating a floor plan in 3ds Max, empowering you with the knowledge and techniques to create accurate and informative plans.
1. Import or Create the Building Model
To begin, you will need to import or create a 3D model of the building in 3ds Max. If you have an existing model, import it into the scene. If not, you can create a simple box or rectangle to represent the building's overall shape. This will serve as the base for your floor plan.
2. Set Up the Camera and Grid
Next, set up the camera and grid to align with the desired floor level. Adjust the camera's position and angle to provide a top-down view of the building. Enable the grid to assist with accurate measurements and placement of walls and other elements.
3. Create the Walls and Doors
Using the Wall and Door tools, start drawing the walls and doors of the floor plan. Ensure that the walls are properly aligned and connected to each other. Extrude the walls to the desired height to create the room spaces.
4. Add Windows and Other Openings
Insert windows and other openings into the walls as needed. Use the appropriate tools to cut holes and create the frames and panes. Pay attention to the size, shape, and placement of these openings to accurately represent the building's design.
5. Define Materials and Textures
Assign materials and textures to the walls, floors, ceilings, and objects in the floor plan. This will enhance the realism and provide a better understanding of the materials used in the building's construction. Use different materials to differentiate between rooms, such as wood for flooring, paint for walls, and tiling for bathrooms.
6. Add Furniture and Fixtures
Populate the floor plan with furniture, fixtures, and other objects to give a sense of scale and functionality. Use the available libraries or create your own custom models to represent the furniture and equipment. Arrange the objects in a logical and realistic manner.
7. Create a Title Block and Dimensions
Finally, add a title block and dimensions to the floor plan. The title block typically includes information such as the building name, project number, scale, and date. Dimensions should be added to accurately represent the distances between walls, doors, and other elements.
8. Rendering and Exporting
Once the floor plan is complete, you can render it to create a high-quality image for presentation or documentation. Choose the appropriate render settings and materials to achieve the desired level of detail and realism. The floor plan can then be exported in various formats, such as JPG, PNG, or PDF, for sharing and distribution.
Conclusion
Creating a floor plan in 3ds Max requires precision, attention to detail, and an understanding of the building's design. By following the steps outlined in this guide, you can create accurate and informative floor plans that effectively communicate the spatial arrangement and elements of a building. Whether you are an experienced user or a beginner, this guide provides a solid foundation to enhance your skills and elevate your design workflow in 3ds Max.

3ds Max Pt 1 Extruding A Floor Plan

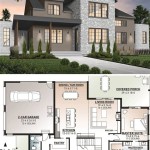
Create 3d Floor Plan Rendering In 3ds Max Architecture Tutorial

3ds Max Tutorial 3d Cut Plan And Best Vray Setting

3d Cut Floor Plan In Max Vray Part 1

3ds Max Basic 3d Floor Plan Modeling Wall Door Windows Tutorial

Your Project Virtually With 3ds Max Architectural Floor Plan Rendering

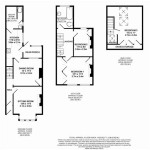
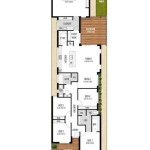
Floor Plans In 3ds Max

3ds Max Pt 2 Extruding A Floor Plan Design Blender Architecture

How To Make 3d Floor Plan 3ds Max Part I

3ds Max Basic 3d Floor Plan Modeling Wall Door Windows Tutorial