How to Create a Floor Plan Using Microsoft Excel
While specialized software offers dedicated tools for floor plan creation, Microsoft Excel can serve as a viable alternative, particularly for simpler designs or initial drafts. Leveraging Excel's grid-based structure and formatting capabilities allows for the visual representation of rooms, walls, and basic architectural elements. This article details the process of constructing a floor plan within Excel, outlining key steps and considerations for achieving a reasonably accurate and informative depiction.
Preparing the Excel Worksheet
The foundational step involves configuring the Excel worksheet to provide a suitable canvas for the floor plan. This entails adjusting row heights and column widths to create a visually square grid, mimicking the uniformity of a drafting surface. Accurate scaling depends heavily on the established dimensions within the spreadsheet. A typical starting point might be setting both row height and column width to a similar small value, such as 25 pixels, to achieve a relatively square appearance for each cell. Experimentation with these values may be necessary to find the optimal setting for the desired level of detail.
Once the cell sizing is adjusted, consider the overall scale of the floor plan. Determine the desired ratio between the Excel grid and the real-world dimensions of the building or space. For instance, one cell could represent one foot, one inch, or even a fraction thereof. The chosen scale will dictate the number of cells required to represent each wall, room, or feature within the plan. It is crucial to document this scale prominently within the worksheet for reference during the design process and for subsequent interpretation of the floor plan.
Beyond cell sizing and scaling, utilize Excel's gridlines to your advantage. While the default gridlines are helpful as a basic guide, customizing their appearance can enhance clarity. Consider thickening the gridlines or changing their color to improve visibility. Alternatively, the gridlines can be hidden altogether, and borders can be applied manually to individual cells or ranges of cells to define the outlines of rooms and walls. The choice depends on personal preference and the desired level of visual detail.
Freezing the top row and leftmost column can also be beneficial. This keeps row and column headers visible as the user scrolls through large floor plans, aiding in maintaining orientation and understanding the spatial relationships within the design. Activate the "Freeze Panes" function under the "View" tab, selecting the option to freeze the top row and left column simultaneously.
Drawing Walls and Defining Rooms
With the worksheet prepared, the next phase involves constructing the walls and defining the rooms within the floor plan. Walls are represented by drawing borders around the appropriate cells. Excel's "Format Cells" dialog box, accessed by right-clicking on a cell or range of cells and selecting "Format Cells," provides a range of border styles, thicknesses, and colors. Use thicker border lines to represent exterior walls and thinner lines for interior walls, providing visual differentiation. Varying border colors can also be used to indicate different wall types, such as load-bearing walls or partition walls.
To draw a wall, select the cells that correspond to the length and thickness of the wall according to the established scale. Then, access the "Format Cells" dialog box and apply the desired border style to the appropriate sides of the selection. For example, to draw a horizontal wall, apply a top border to the selected cells. To draw a vertical wall, apply a left or right border. Accurate alignment of walls is critical to creating a coherent floor plan. Utilize Excel's zooming capabilities to fine-tune the placement of borders and ensure that walls connect seamlessly at corners.
Room dimensions are determined by the number of cells enclosed by the walls. Calculate the area of each room by multiplying the number of cells representing its length and width, then applying the established scale. Room names or labels can be entered directly into the cells within the room, using Excel's text formatting options to adjust font size, style, and alignment for optimal readability. Consider using different background colors for each room to visually distinguish them. This can be achieved through the "Format Cells" dialog box under the "Fill" tab.
For more complex room shapes, utilize Excel's ability to merge cells. Merging cells allows for the creation of irregularly shaped spaces, such as angled walls or curved features. However, exercise caution when merging cells, as it can affect the alignment of other elements within the floor plan. Ensure that merging cells does not disrupt the overall grid structure or compromise the accuracy of the design.
Adding Architectural Elements and Details
Beyond basic walls and rooms, a floor plan often includes architectural elements such as doors, windows, stairs, and fixtures. Representing these elements in Excel requires a combination of border formatting, cell coloring, and text labels. Doors, for example, can be represented by a gap in a wall border, indicating the doorway, and a small arc drawn using Excel's drawing tools to show the direction of the door swing. The arc can be added by inserting a "Shape" from the "Insert" tab and selecting an arc shape.
Windows can be depicted as a series of short, parallel lines within a wall. Use thin border lines to create these lines, ensuring that they are evenly spaced and centered within the wall thickness. Alternatively, colored rectangles can be used to represent windows, providing a more visually distinct representation. Staircases can be represented by a series of parallel lines indicating the steps, along with an arrow indicating the direction of ascent. Utilize Excel's drawing tools to create these lines and arrows, ensuring that they are accurately positioned and scaled.
Representing fixtures such as toilets, sinks, and appliances requires a more abstract approach. Utilize Excel's drawing tools to create simple shapes that resemble the fixtures. For example, a rectangle can represent a bed, a circle can represent a toilet, and a small square can represent a sink. Label each fixture with a text label to clarify its purpose. Consider using different colors for different types of fixtures to visually distinguish them within the floor plan.
Text labels are crucial for providing additional information and clarifying the purpose of various elements within the floor plan. Use Excel's text formatting options to adjust font size, style, and alignment for optimal readability. Label each room with its name or function. Add dimensions to walls and rooms, indicating their length and width. Include notes or annotations to explain specific design features or materials. Strive for clarity and conciseness in your text labels to ensure that the floor plan is easily understood by others.
Scaling and Printing the Floor Plan
Once the floor plan is complete, review it carefully for accuracy and completeness. Ensure that all walls are properly aligned, all rooms are correctly dimensioned, and all architectural elements are accurately represented. Verify that the established scale is consistently applied throughout the design. Make any necessary corrections or adjustments before proceeding to the printing stage.
Printing a floor plan created in Excel requires careful attention to scaling and page setup. Excel's default printing settings may not accurately reflect the established scale of the floor plan, resulting in a distorted or unreadable printout. To address this, access the "Page Layout" tab and adjust the scaling options. Experiment with different scaling percentages to find the optimal setting that fits the floor plan onto the desired paper size while maintaining a reasonable level of detail.
Use the "Print Preview" feature to visualize how the floor plan will appear on the printed page. Adjust the margins, headers, and footers as needed to optimize the layout. Consider adding a title block to the floor plan, including information such as the project name, date, scale, and architect or designer's name. This provides context and documentation for the floor plan.
If the floor plan is too large to fit on a single page, utilize Excel's tiling capabilities to print it across multiple pages. Ensure that the tiles are properly aligned and that there is sufficient overlap between them to facilitate assembly. Alternatively, consider exporting the floor plan as a PDF file and printing it at a larger scale using a dedicated PDF viewer.

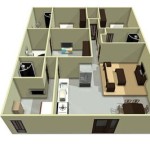
3 Ways To Draw And Create A Floorplan In Excel Like Cad With Examples

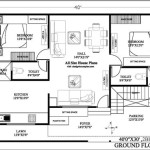
How To Create A 60 X 20 Floor Plan In Microsoft Excel Using Verbal Scale

How To Make A Floorplan In Excel Microsoft Tips

How To Make Create A Floor Plan On Microsoft Excel Templates Examples 2024

Create Floor Plan Using Ms Excel 5 Steps With Pictures Instructables

How To Create A Floor Plan Using Excel

How To Draw And Create A Floor Plan In Excel Like Cad Part 2 Live Examples With Addin Link

How To Make Create A Floor Plan On Microsoft Excel Templates Examples 2024

How To Create A Floor Plan Using Excel

How To Create A Floor Plan Using Excel


