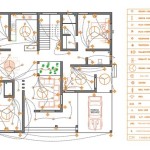
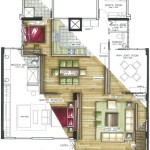
How to Make a House Plan in AutoCAD 2017
AutoCAD is a powerful computer-aided design (CAD) software used by architects, engineers, and other professionals to create precision drawings. It offers a wide range of tools and features that make it ideal for creating house plans. This step-by-step guide will show you how to make a house plan in AutoCAD 2017: ### 1. Create a New Drawing: - Open AutoCAD 2017 on your computer. - Click on the "File" tab and select "New" to create a new drawing. - Choose the "Architectural" template from the list of templates. - Click "OK" to open the new drawing. ### 2. Set Drawing Units: - Click on the "Units" button in the "Status Bar" at the bottom of the AutoCAD window. - Choose "Architectural" units from the "Units" drop-down menu. - Select the desired units of measurement (e.g., inches, feet, or meters). ### 3. Create Wall Layers: - Click on the "Layer" tab in the "Layers" panel. - Click on the "New Layer" button to create a new layer for the walls. - Name the layer "Walls" and choose a color for it. - Repeat this step to create additional layers for other elements like doors, windows, furniture, and appliances. ### 4. Create the Building Outline: - Activate the "Walls" layer. - Click on the "Line" tool in the "Draw" panel. - Draw the outline of the building, using straight lines or arcs as needed. - Close the outline by connecting the last point to the first point. ### 5. Add Interior Walls: - Activate the "Walls" layer again. - Click on the "Line" tool and draw lines to represent the interior walls of the house. - Make sure to align the interior walls with the exterior walls and connect them properly. ### 6. Insert Doors and Windows: - Activate the "Doors" or "Windows" layer. - Click on the "Insert" tab and select "Block". - Browse to the folder containing the door or window blocks that you want to use. - Select the desired block and click "OK" to insert it into the drawing. - Position the door or window in the desired location and angle. ### 7. Add Dimensions: - Click on the "Dimension" tab in the "Annotate" panel. - Select the "Linear" dimension tool and click on two points to measure a line. - Click on the "Angular" dimension tool and click on three points to measure an angle. - Adjust the dimension style and placement as needed. ### 8. Add Furniture and Appliances: - Activate the appropriate layer for furniture or appliances. - Click on the "Insert" tab and select "Block". - Browse to the folder containing the furniture or appliance blocks that you want to use. - Select the desired block and click "OK" to insert it into the drawing. - Position the furniture or appliance in the desired location and angle. ### 9. Add Text and Notes: - Click on the "Text" tool in the "Annotate" panel. - Click on the desired location and type the text or notes. - Adjust the text style, size, and placement as needed. ### 10. Save and Export: - Click on the "File" tab and select "Save" to save the drawing. - Choose a file name and location to save the drawing file. - Click on the "File" tab and select "Export" to export the drawing to another format. - Choose the desired file format (e.g., PDF, JPEG, DWG) and click "Export" to save the drawing in that format. ### Conclusion: By following these steps, you can create a basic house plan in AutoCAD 2017. However, it's important to note that house plans should be drawn by experienced architects or designers who have the necessary knowledge and skills to ensure the accuracy and safety of the design.
Autocad 2024 Tutorial Making A Simple Floor Plan In 2d Drawing

Autocad 2024 Basic 2d Floor Plan For Beginner Complete

Autocad 2024 Basic 2d Floor Plan For Beginner Complete

Autocad 2024 Making A Simple Floor Plan In Part 1 Of 3 2d Drawing 2025

Basic Floor Plan Drafting In Autocad 7 Steps Instructables

Autocad 2024 Basic 2d Floor Plan For Beginner Complete

Making A Simple Floor Plan In Autocad Part 1 Of 3

How To Draw Floor Plans In Autocad Edrawmax

Autocad 2024 Making A Simple Floor Plan In Part 1 Of 3 2d Drawing 2025

How To Draw Floor Plans In Autocad Edrawmax


