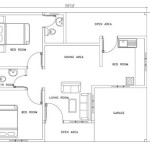
How to Create a House Plan in Excel: A Comprehensive Guide
Creating a house plan can be a daunting task, but with the right tools and techniques, it can be made much easier. Microsoft Excel is a powerful tool that can be used for a variety of tasks, including creating house plans. ### Step 1: Gather Your Materials Before you begin, you will need to gather the following materials: * A computer with Microsoft Excel installed * A measuring tape * A floor plan (if you have one) * Graph paper (optional) ### Step 2: Create a New Excel Spreadsheet Once you have gathered your materials, open Microsoft Excel and create a new spreadsheet. This spreadsheet will be used to create your house plan. ### Step 3: Set Up the Grid The first step is to set up the grid that will form the basis of your house plan. To do this, click on the "Page Layout" tab and then click on the "Gridlines" button. This will add gridlines to your spreadsheet. ### Step 4: Measure and Draw Your Walls Now it's time to measure and draw the walls of your house. To do this, use the measuring tape to measure the length and width of each wall. Then, use the gridlines in Excel to draw the walls. ### Step 5: Add Doors and Windows Once you have drawn the walls, it's time to add the doors and windows. To do this, click on the "Insert" tab and then click on the "Shapes" button. This will open a library of shapes that you can use to insert doors and windows. ### Step 6: Add Furniture and Other Details Now it's time to add furniture and other details to your house plan. To do this, click on the "Insert" tab and then click on the "Picture" button. This will allow you to insert images of furniture and other items into your house plan. ### Step 7: Save Your House Plan Once you have finished creating your house plan, it's important to save it. To do this, click on the "File" tab and then click on the "Save" button. This will save your house plan as an Excel file. ### Tips for Creating a House Plan in Excel Here are a few tips for creating a house plan in Excel: * Use the zoom feature to get a closer look at your house plan. * Use the "View" tab to change the way your house plan is displayed. * Use the "Page Layout" tab to change the page orientation and margins. * Use the "Format" tab to change the appearance of your house plan. ### Conclusion Creating a house plan in Excel is a great way to visualize your dream home. By following the steps outlined in this guide, you can create a house plan that is both accurate and detailed.
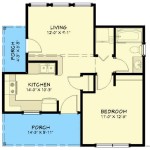
How To Make A Floorplan In Excel Microsoft Tips

How To Create House Plan In Excel With Furniture Drawings

3 Ways To Draw And Create A Floorplan In Excel Like Cad With Examples

Create Floor Plan Using Ms Excel 5 Steps With Pictures Instructables

Create Floor Plan Using Ms Excel 5 Steps With Pictures Instructables

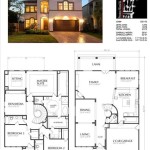
How To Create House Plans Elevations In Microsoft Excel Using Verbal Scale

How To Make A Floorplan In Excel Microsoft Tips

Create Floor Plan Using Ms Excel 5 Steps With Pictures Instructables

Create Floor Plan Using Ms Excel 5 Steps With Pictures Instructables

3 Ways To Draw And Create A Floorplan In Excel Like Cad With Examples

