How to Make a Floor Plan in SketchUp Layout
SketchUp Layout is a powerful tool for creating professional-quality floor plans. It offers a wide range of features and tools that make it easy to create accurate and detailed plans. In this article, we will walk you through the essential steps of how to make a floor plan in SketchUp Layout.
1. Create a New Document
To create a new floor plan in SketchUp Layout, open the software and click on the "File" menu. Then, select "New" and choose the "Floor Plan" template. This will create a new document with the correct settings for creating a floor plan.
2. Import Your SketchUp Model
If you have already created a 3D model of your floor plan in SketchUp, you can import it into Layout by clicking on the "File" menu and selecting "Import." Navigate to the location of your SketchUp file and click "Open." The model will be imported into Layout.
3. Set the Scale
Once you have imported your SketchUp model, you need to set the scale of the drawing. This will ensure that the floor plan is accurate and to scale. To set the scale, click on the "View" menu and select "Scale." In the "Scale" dialog box, enter the desired scale for the floor plan. For example, if you want the floor plan to be 1/4" = 1', enter "1:48" in the "Scale" field.
4. Create the Floor Plan
Now you can start creating the floor plan. To do this, use the "Line" tool to draw the outlines of the walls, doors, and windows. You can also use the "Rectangle" tool to draw rooms and other areas. To add labels to the floor plan, use the "Text" tool.
5. Add Dimensions
Dimensions are an essential part of any floor plan. To add dimensions, use the "Dimension" tool. Click on the start point of the dimension line and then click on the end point. The dimension will be automatically calculated and displayed on the floor plan.
6. Add Annotations
Annotations can be used to add additional information to the floor plan, such as notes, symbols, and callouts. To add annotations, use the "Annotation" tool. Click on the location where you want to place the annotation and then select the type of annotation you want to add.
7. Export the Floor Plan
Once you have finished creating the floor plan, you can export it to a variety of file formats, including PDF, JPG, and DWG. To export the floor plan, click on the "File" menu and select "Export." In the "Export" dialog box, select the desired file format and click "Export."
Conclusion
Creating a floor plan in SketchUp Layout is a relatively simple process. By following the steps outlined in this article, you can create professional-quality floor plans that are accurate and to scale.

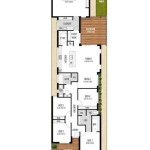
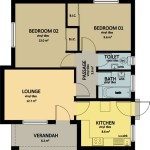
Layout Floor Plan Pro Sketchup Community

Layout Floor Plan Pro Sketchup Community

Creating Floorplans Can This Not Be Done More Organically In Sketchup Pro Community

2d Floor Plans Without Drawing The 3d Object Pro Sketchup Community

Layout Floor Plan Pro Sketchup Community

Create A Floor Plan Only In 2d Or Layout Pro Sketchup Community

How To Draw Floor Plans In Sketchup Edrawmax

Creating A Floor Plan In Layout 2024 From Sketchup Model Part 1

How To Automatically Convert Sketchup Model Into 2d Floorplan With Measurement Requests Discussion Community

How To Automatically Convert Sketchup Model Into 2d Floorplan With Measurement Requests Discussion Community