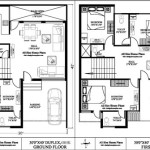
How to Sketch a House Floor Plan
Whether you're an architect, a homeowner, or simply curious about the layout of your home, knowing how to sketch a floor plan is a valuable skill. A floor plan is a scaled, two-dimensional drawing that shows the layout of a building from above. It can be used for a variety of purposes, including:
- Planning a renovation or addition
- Creating a furniture layout
- Determining the square footage of a home
- Understanding the flow of traffic through a space
Sketching a floor plan is not as difficult as it may seem. With a little practice, you can create a floor plan that is both accurate and easy to understand. Here are the steps on how to sketch a house floor plan:
1. Gather Your Materials
You will need:
- A piece of graph paper or drafting paper
- A pencil and eraser
- A ruler
- A scale (optional)
2. Measure the Room
The first step is to measure the room you want to sketch. Measure the length and width of the room, as well as the height of the ceiling. If you are using a scale, divide the actual measurements by the scale factor. For example, if you are using a scale of 1:100, you would divide the actual measurements by 100.
3. Draw the Outline of the Room
Once you have the measurements, you can draw the outline of the room on the paper. Start by drawing a rectangle to represent the floor. Then, draw lines to represent the walls. Be sure to include all of the doors and windows.
4. Add the Interior Features
Once you have the outline of the room, you can start to add the interior features. This includes things like furniture, appliances, and fixtures. Be sure to label each item so that you can easily identify it later.
5. Check Your Work
Once you have finished sketching the floor plan, take a step back and check your work. Make sure that all of the measurements are correct and that all of the features are included. If you find any errors, correct them before moving on.
6. Finalize the Floor Plan
Once you are satisfied with your floor plan, you can finalize it by adding a title and a legend. The title should include the name of the room and the date. The legend should explain the symbols and abbreviations used in the floor plan.
Tips for Sketching Floor Plans
Here are a few tips for sketching floor plans:
- Use a scale to ensure that your floor plan is accurate.
- Label all of the features on your floor plan so that you can easily identify them later.
- Keep your floor plans organized by storing them in a binder or folder.
- Use different colors to represent different types of features, such as walls, doors, and windows.
- Practice regularly

Floor Plan Creator And Designer Free Easy App

Floor Plans Types Symbols Examples

How To Draw A Floor Plan Live Home 3d

Floor Plan House Sketch Vector Ilration Plans

Floor Plans Types Symbols Examples

House Plan Drawing Everything You Need To Know

How To Draw A Floor Plan By Hand Step Guide

Draw Floor Plans In Half The Time Cedreo

Make Your Own Blueprint How To Draw Floor Plans Drawing House Sketch Plan Blueprints

Easy Home Building Floor Plan Cad Pro


