Simple Dog House Plans: A Woodworking Guide
Building a dog house is a rewarding woodworking project that provides a safe and comfortable shelter for your furry friend. By following simple plans, even novice woodworkers can create a durable and charming home for their dog. This article will guide you through the process of building a dog house using readily available materials and easy-to-follow instructions.
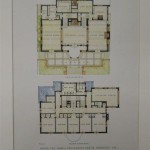
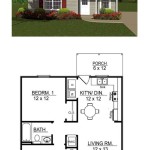
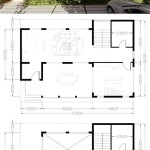
1. Planning and Design
The first step in building a dog house is to determine the size, style, and features you desire. Consider the size of your dog, the climate you live in, and your budget. Measure your dog's height and length from nose to tail to ensure ample space for comfort and movement.
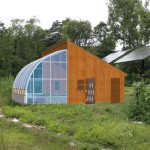
Choosing a simple design is crucial for beginners. A rectangular or A-frame shape is easy to construct and provides a basic shelter. You can personalize the design with decorative elements like a porch, windows, or a raised platform.
It's essential to select appropriate materials. Plywood, cedar, and pressure-treated lumber offer durability and weather resistance. Use weatherproof roofing shingles or metal panels for the roof to protect against rain and snow.
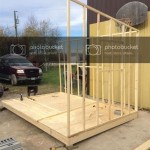
2. Cutting and Assembling the Frame
Once you have your materials and design, you can begin cutting lumber to the desired dimensions. Use a saw, miter saw, or circular saw for accurate cuts. Mark the lumber carefully to avoid mistakes.
Start by constructing the base and walls of the dog house. Cut four pieces of lumber for the base and four for the walls, ensuring they are all the same length. Join the pieces using wood glue and screws.
Next, create the roof structure. For a simple A-frame roof, cut two identical triangular shapes. Attach them to the top of the walls using wood glue and screws. Use a level to ensure the roof is square and level.
3. Adding Insulation and Finishing Touches
Insulating the dog house is crucial for maintaining a comfortable temperature. Choose a suitable insulation material like fiberglass batting or foam board. Cut the insulation to fit the walls and roof, and secure it with staples or adhesive spray.
To add a finishing touch, apply a protective layer of paint or stain to the exterior of the dog house. This will help prevent water damage and enhance the appearance. Choose weather-resistant paints or stains for longevity.
Finally, consider adding a waterproof floor. This will help keep the dog house dry and prevent moisture from seeping into the wood. Use treated lumber or plywood, and seal the floor with a water-resistant sealant.
4. Installation and Placement
Once the dog house is assembled, you can install it in a suitable location. Choose a spot that is level, dry, and protected from the elements. Avoid areas with direct sunlight or extreme heat.
Secure the dog house to the ground using concrete blocks or stakes. This will prevent the house from shifting or being blown away by wind.
To encourage your dog to use the house, place a comfortable bed inside and provide a few treats. You can also add a small toy to make the house more inviting.
:strip_icc()/Beautiful-Pallet-Dog-House-with-Veranda-1-5a202f90494ec90037893a82.jpg?strip=all "14 Free Diy Dog House Plans Anyone Can Build")
14 Free Diy Dog House Plans Anyone Can Build

Diy Modern Dog House For Oscar The Awesome Orange

13 Diy Doghouse Plans And Ideas The House Of Wood

Simple Diy Dog House Plans In 2024 Easy

Dog House Plans Free Diy Projects Construct101 Wooden

13 Diy Doghouse Plans And Ideas The House Of Wood
:strip_icc()/IMG_2589-5a202f1c7d4be800191a3845.jpg?strip=all "14 Free Diy Dog House Plans Anyone Can Build")
14 Free Diy Dog House Plans Anyone Can Build

Build A Cedar Doghouse

20 Free Diy Dog House Plans Care Com Resources

Diy Dog Houses House Projects Homemade Pet Homes Easy Home Cool