SketchUp 2D Floor Plan Tutorial: A Comprehensive Guide for Beginners
SketchUp, a powerful and versatile 3D modeling software, offers an impressive array of functionalities that cater to architects, designers, and hobbyists alike. Among its robust features is the ability to create detailed and accurate 2D floor plans, a crucial aspect of architectural design and interior planning. This tutorial will provide you with a comprehensive step-by-step guide to mastering SketchUp's 2D floor plan capabilities.
1. Getting Started with a New SketchUp Document
Begin by opening SketchUp and selecting "New" to create a new document. Choose the "Architectural Design" template, which provides a pre-defined set of layers and settings optimized for creating floor plans.
2. Setting Up the Floor Plan Area
Using the Line tool, draw a rectangle that represents the outer perimeter of your floor plan. Ensure that the dimensions are accurate and to scale. Double-click inside the rectangle to create a new layer called "Floor Plan." This layer will contain all the elements of your floor plan.
3. Creating Walls and Openings
Start drawing walls by selecting the Rectangle tool and clicking on the edges of the floor plan rectangle. Use the Push/Pull tool to extrude the walls to the desired height. To create openings for doors and windows, use the Line tool to draw a rectangle representing the opening on one of the walls. Select the Face tool and click on the face of the wall where the opening should be, then right-click and select "Intersect Faces with Model." This will create a clean opening.
4. Adding Doors and Windows
Insert doors and windows by selecting the appropriate symbols from the 3D Warehouse. Position the symbols in the corresponding openings created in the previous step. Use the Scale tool to adjust the size if necessary.
5. Creating Interior Features
To furnish your floor plan, draw objects representing furniture, fixtures, and other interior elements using the Line, Rectangle, and Circle tools. Group these objects together using the Group tool to organize your scene. Add textures and materials using the Materials panel to enhance the realism of your floor plan.
6. Adding Dimensions and Annotations
Include vital dimensions by selecting the Tape Measure tool and clicking on the edges of walls and openings. Label rooms and other areas of the floor plan by using the Text tool. Add arrows, symbols, and other annotations to convey additional information.
7. Exporting the Floor Plan
Once your floor plan is complete, you can export it in various formats. Select "Export" from the File menu and choose the desired export format, such as DWG, PDF, or JPG. Adjust the export settings according to your specific requirements.
Conclusion
Congratulations on completing your first SketchUp 2D floor plan! By following these steps, you have gained the fundamental skills necessary to create detailed and informative floor plans for your architectural or design projects. Remember to practice regularly to refine your skills and delve deeper into SketchUp's advanced features.

Sketchup Floor Plan Tutorial For Beginners

Sketchup Interior Design Tutorial How To Create A Floor Plan In 7 Easy Steps

Basic Sketchup Tutorial How To Turn 2d Drawing Into 3d

How To Automatically Convert Sketchup Model Into 2d Floorplan With Measurement Requests Discussion Community

Sketchup Tutorial How To Draw A Floor Plan From File

How To Create A Floor Plan With Sketchup Easy Steps

2d Drawing In Sketchup Popular Woodworking

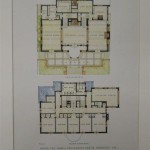
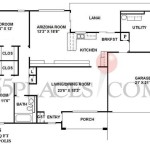
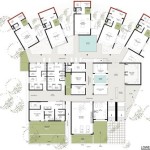
Sketchup 2d Floor Plan

Sketchup Tutorial How To Create A Quick Floor Plan

How To Automatically Convert Sketchup Model Into 2d Floorplan With Measurement Requests Discussion Community