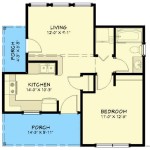
Essential Aspects of SketchUp Layout Floor Plan Tutorial
SketchUp Layout is a powerful tool for creating professional-quality floor plans. It's easy to learn and use, even for beginners. In this tutorial, we'll cover the essential aspects of creating a floor plan in SketchUp Layout.
Getting Started
Start by opening SketchUp Layout and creating a new document. Select the "Floor Plan" template. This template provides a starting point with the correct settings for creating a floor plan.
Importing a SketchUp Model
If you have an existing SketchUp model of your floor plan, you can import it into Layout. Click "File" > "Import" and select your SketchUp model. The model will be placed on the page.
Creating Walls and Doors
To create walls, select the "Rectangle" tool from the toolbar. Click and drag to draw the walls. To create doors, select the "Door" tool. Click on a wall to place a door.
Adding Dimensions
Dimensions are essential for any floor plan. To add dimensions, select the "Dimension" tool from the toolbar. Click on two points to create a dimension line.
Adding Text and Annotations
You can add text and annotations to your floor plan to provide additional information. To add text, select the "Text" tool from the toolbar. Click on the page and type your text. To add annotations, use the "Annotation" tools from the toolbar.
Creating a Title Block
A title block provides information about the floor plan, such as the project name, date, and scale. To create a title block, select the "Title Block" tool from the toolbar. Click on the page and enter the necessary information.
Exporting Your Floor Plan
Once you're finished creating your floor plan, you can export it to a variety of formats. To export your floor plan, click "File" > "Export". Select the desired format and click "Export".
Conclusion
Creating a floor plan in SketchUp Layout is easy and straightforward. By following these essential aspects, you can create professional-quality floor plans that will help you communicate your design ideas clearly.

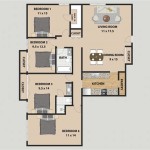
Sketchup Floor Plan Tutorial For Beginners

Creating A Floor Plan In Layout With Sketchup 2024 S New Tools Apartment For Part 5

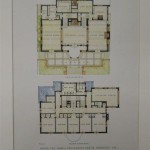
Sketchup And Layout Tutorials

How To Draw Floor Plans In Sketchup Edrawmax

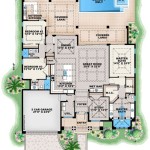
Sketchup Interior Design For Layout 4 Creating Our First Floor Plan In

Creating A Floor Plan In Layout 2024 From Sketchup Model Part 1

Creating A Door Schedule In Sketchup 2024 And Layout Interior Design Modeling For The Essentials Institute Model

How To Automatically Convert Sketchup Model Into 2d Floorplan With Measurement Requests Discussion Community

Completing The Floor Plan Raster Sketchup Tutorial Linkedin Learning Formerly Lynda Com

Creating A 2d Plan Of Your Sketchup Model In Layout Blog