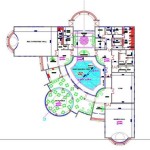
Essential Aspects of Creating a Floor Plan in AutoCAD
AutoCAD (Computer-Aided Design) is a renowned software program widely utilized by architects, engineers, and designers to create detailed and precise technical drawings. One of the fundamental tasks in AutoCAD is the creation of floor plans, which serve as blueprints for constructing and renovating buildings.
Creating a floor plan in AutoCAD involves several crucial steps that ensure accuracy, clarity, and adherence to industry standards. By following these steps meticulously, you can generate high-quality floor plans that effectively communicate design intent and facilitate efficient construction.
1. Define the Drawing Area and Units
Before embarking on drawing, it is essential to establish the drawing area and measurement units. Select the desired drawing units (e.g., inches, centimeters) and set the drawing limits to define the extent of the floor plan. This step ensures that the drawing adheres to the project's scale and provides context for the subsequent elements.
2. Create Walls and Partitions
The foundation of any floor plan lies in the walls and partitions that define the layout of rooms and spaces. Using the line tool, draw parallel lines to form the walls, ensuring that the thickness and height of the walls correspond to the project specifications. Additionally, insert doors and windows at appropriate locations to allow for access and natural light.
3. Add Architectural Features
Once the basic structure is established, incorporate architectural features such as stairs, columns, and ceiling heights. Use the appropriate AutoCAD commands to insert these elements accurately and in accordance with the design requirements. Consider using layers to organize different architectural features, facilitating easier editing and visibility control.
4. Furnish the Floor Plan
To make the floor plan more comprehensive and practical, add furniture and fixtures to represent the intended use of each space. Utilize AutoCAD's block library or create your own custom blocks to insert furniture, appliances, and other objects. By furnishing the floor plan, you can visualize the space's functionality and explore different layout options.
5. Include Dimensions and Annotations
Adding dimensions and annotations is crucial for clarity and construction purposes. Use the dimensioning tools to indicate the length, width, and height of walls, rooms, and other features. Annotations such as room labels, notes, and symbols provide additional information and guidance for the construction team.
6. Set Layer Visibility and Lineweights
To enhance readability and organization, manage layer visibility and lineweights. Layer visibility allows you to selectively display or hide elements, while lineweights differentiate between different types of lines (e.g., walls, partitions, dimensions). This step improves the clarity and hierarchy of the floor plan.
7. Review and Finalize
Before finalizing the floor plan, thoroughly review it for accuracy, consistency, and adherence to design intent. Check for any errors or omissions and make necessary corrections. Once satisfied, save the drawing in the appropriate file format and scale it as required for printing or sharing.
By following these essential steps, you can create comprehensive and accurate floor plans in AutoCAD. Remember to consider the project's specific requirements, maintain consistency throughout the drawing, and utilize AutoCAD's powerful tools and features to produce high-quality results.

Basic Floor Plan Drafting In Autocad 7 Steps Instructables

Making A Simple Floor Plan In Autocad Part 1 Of 3

How To Make House Floor Plan In Autocad Fantasticeng

How To Draw Floor Plans In Autocad Edrawmax

Autocad Draw A Staircase For Floor Plan Step By

Making A Simple Floor Plan In Autocad Fantasticeng

How To Draw Floor Plans In Autocad Edrawmax

Autocad Simple Floor Plan For Beginners 1 Of 5

Autocad Tutorial Draw A House Floor Plan Free Cad Blocks In Dwg File Format

How To Draw A Door In Autocad Floor Plan Backstudio Milan


